

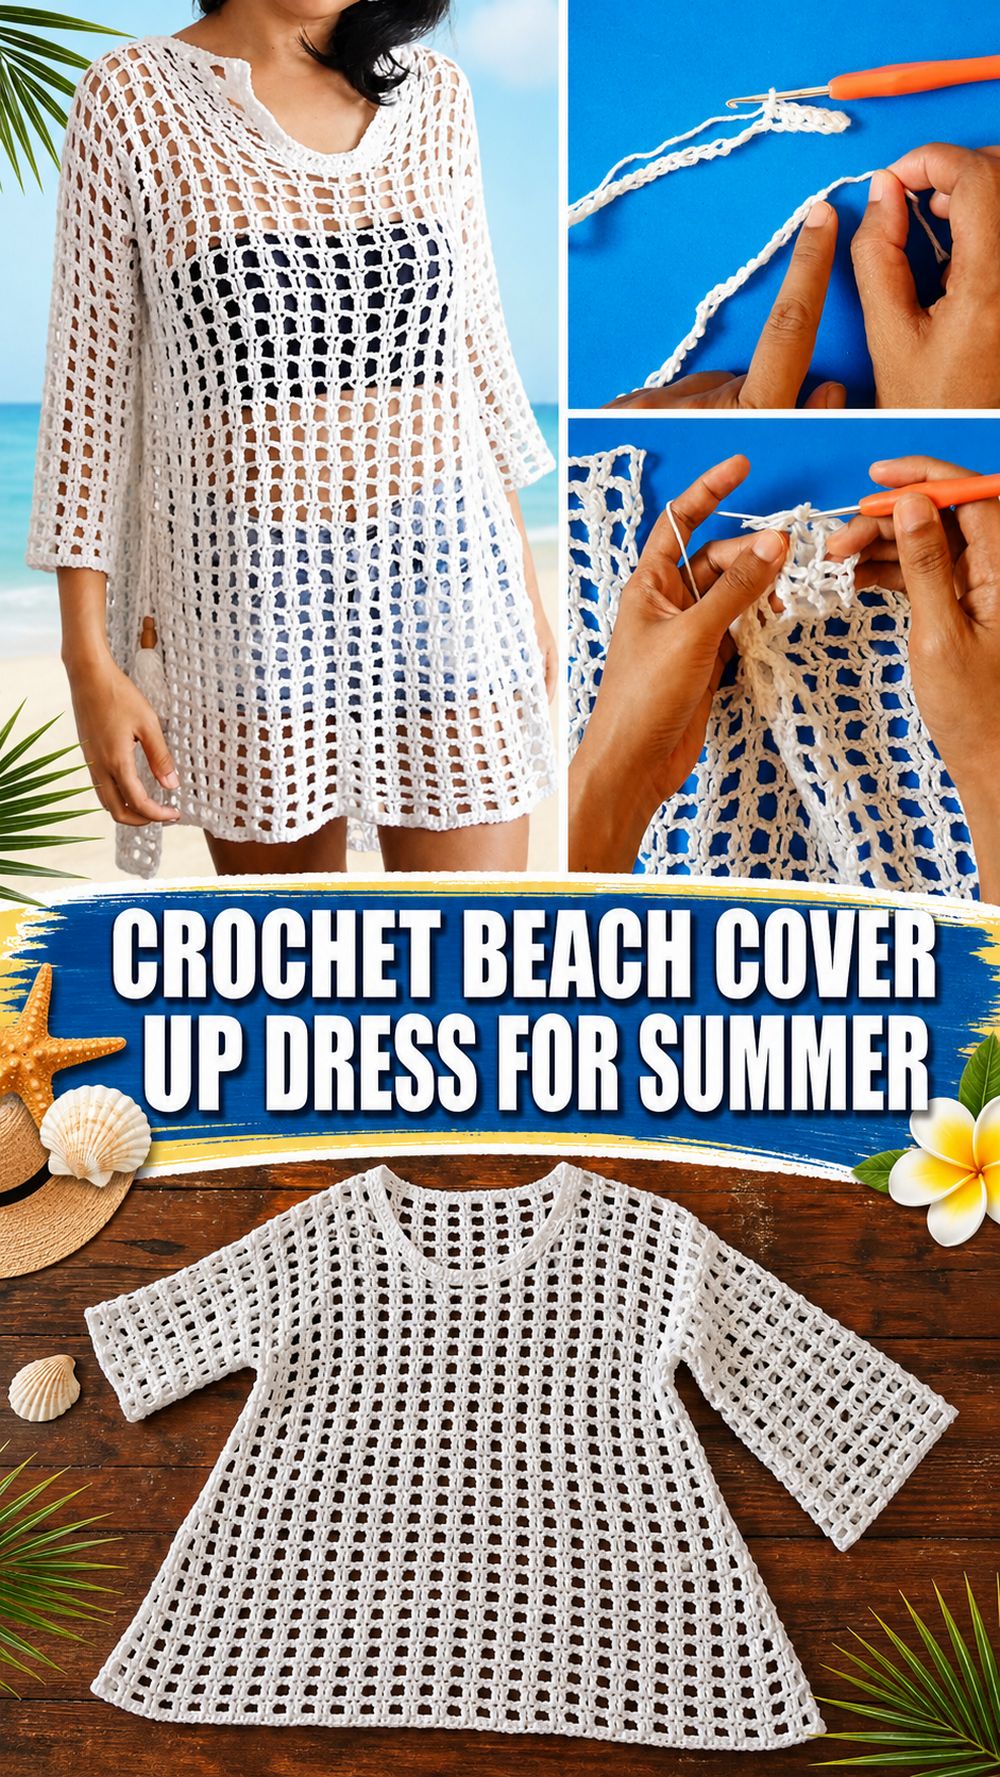
A crochet beach cover up is one of the nicest warm-weather projects because it feels light, useful, and stylish all at once. It is the kind of handmade piece you can slip on over swimwear for a beach day, a poolside afternoon, or a relaxed holiday look, while still feeling comfortable and easy to wear. The tutorial I selected teaches an easy crochet beach cover up dress and presents it as beginner friendly, which makes it a lovely choice for anyone who wants a wearable project without overly complicated shaping. It also includes sizing from S to 4XL, so the design has room to work for different body sizes and fit preferences. This kind of project is especially satisfying because it gives you a practical summer garment with an airy handmade texture.
Why You’ll Love This Project:
This project is fun because it gives you a real summer garment without feeling too heavy or complicated. The selected tutorial describes it as easy and beginner friendly, so it is a great choice when you want something wearable, breezy, and satisfying to finish.
Materials Needed:
- Yarn for a lightweight summer cover up
- Crochet hook
- Scissors
- Yarn needle
- Stitch markers
- Measuring tape
Use a yarn and hook size that matches your desired fit and texture.
Best Yarn for This Project:
For a beach cover up, lightweight cotton, bamboo blend, or another breathable yarn works best. These yarns help the fabric feel cooler and more comfortable in warm weather, and they also suit open crochet textures beautifully. Since this project is meant to be worn over swimwear or as a beach layer, a yarn with a soft feel and nice drape is usually the best choice.
Skill Level:
This project is beginner-friendly to easy. The chosen tutorial specifically describes the cover up as easy and beginner friendly, so it is a strong option for newer crocheters who want to try a wearable summer project.
Size and Fit Guide:
The tutorial notes a size range from S to 4XL, which means the design is intended to work across multiple sizes. The easiest way to get the fit you want is to measure around the fullest part of the body area the cover up will sit over, then compare your work as you go. Since a beach cover up usually looks nicest with a slightly relaxed feel, you may want a little ease rather than a very close fit. You can also adjust the length depending on whether you want it shorter and more playful or longer and more dress-like.
Stitches Used:
The search result confirms that this is a full beach cover up dress tutorial, but it does not show every stitch name in the snippet. For accuracy, the exact row-by-row stitch sequence is best followed directly from the video. What is clear is that this is a full wearable crochet tutorial designed for a summer cover up dress rather than just a showcase.
How to Make It:
Step 1: Start the Foundation
Begin by creating the foundation for the body of the cover up. Since this is a summer dress-style cover up, it helps to keep your starting edge comfortable and not too tight. A relaxed beginning will make the whole piece drape better and feel nicer to wear over a swimsuit. Focus on even tension right from the start so the fabric builds smoothly.
Step 2: Build the Main Fabric
Work the main stitch pattern shown in the tutorial until the body begins to take shape. Because this is presented as an easy beach cover up dress, the overall construction is meant to be approachable rather than heavily shaped or overly technical. Keep checking that the fabric stays even and that the texture still feels light and breathable. An airy fabric is one of the nicest things about a cover up, because it helps the finished piece feel summery and comfortable.
Step 3: Shape the Dress Length
As the project grows, decide how long you want your cover up to be. Some people prefer a shorter beachy look, while others like a little more coverage. This is one of the easiest ways to personalize the project. Compare the work against your body or against a cover up or dress length you already like. If you want a tunic feel, stop sooner. If you want more of a beach dress, continue longer.
Step 4: Adjust the Width and Fit
Since the tutorial includes multiple sizes, keep your own measurements in mind as you work. A beach cover up usually needs enough space to slip on easily and move comfortably, especially if it is worn over swimwear. Check the width around the bust, waist, or hips depending on the shape of the design. This is the stage where you make sure the piece feels breezy instead of restrictive.
Step 5: Form the Wearable Shape
As you continue following the tutorial, begin shaping the garment so it starts to look like a real cover up rather than a flat crochet panel. Depending on the construction in the video, this may involve creating openings, defining the upper section, or joining parts of the piece together. Since the selected tutorial is for a full beach cover up dress, this is the stage where the item becomes clearly wearable.
Step 6: Join and Seam Carefully
If the project uses separate sections or side joins, seam them neatly and make sure the openings feel comfortable. A summer cover up should be easy to put on and pleasant to wear, so avoid pulling your joins too tightly. Smooth seams help the finished garment look cleaner and sit better on the body.
Step 7: Finish the Edges
Go over the neckline, arm openings, and lower edge if the tutorial includes edge finishing. Even a simple border can make the whole project look more polished. Weave in all loose ends securely, especially since beachwear gets worn and moved around a lot. A tidy finish helps the garment feel complete and practical.
Step 8: Final Look
When finished, the cover up should feel airy, light, and easy to wear over swimwear. It should have that relaxed handmade beach style that looks effortless but still polished. Because the tutorial is described as an easy beginner-friendly beach cover up dress with sizing from S to 4XL, the final result is meant to be approachable, wearable, and adaptable.
Helpful Tips:
- Use breathable yarn for the best summer feel.
- Keep your foundation edge loose enough for easy wear.
- Check the fit before final seaming.
- Compare the length against your body as you work.
- Use stitch markers if you need help keeping edges neat.
- Choose a yarn color that works well over your favorite swimwear.
Common Mistakes to Avoid:
- Making the starting chain too tight
- Choosing yarn that feels too heavy for a beach garment
- Forgetting to check width before the piece gets too long
- Seaming too tightly and losing drape
- Skipping fit checks until the very end
- Leaving yarn ends unsecured in a frequently worn item
Customization Ideas:
You can make this cover up shorter, longer, looser, or more fitted depending on your style. It would look lovely in white, cream, sandy beige, ocean blue, coral, or soft pastel shades. You could also wear it as a poolside layer, a beach dress, or a tunic-style summer piece depending on the final length.
Style Ideas:
This cover up looks beautiful over a swimsuit, bikini, or simple slip dress. It pairs nicely with sandals, a sun hat, a woven tote, and other easy summer accessories. It is also a lovely handmade piece for holidays, pool days, and relaxed resort-style outfits.
Care Instructions:
Wash gently according to your yarn label. Hand washing is often the safest choice for crochet garments, especially lightweight summer ones. Reshape while damp and lay flat to dry. Avoid high heat so the cover up keeps its shape and softness.
Time Needed:
This may take a few hours depending on your speed, yarn, size, and stitch pattern.
Conclusion:
A crochet beach cover up is such a satisfying summer project because it is both pretty and practical. It gives you a handmade garment you can really use, while still being light enough to feel enjoyable and seasonal. With a breathable yarn, regular fit checks, and a finish that feels comfortable on the body, you can create a cover up that is easy to wear and lovely to style all summer long.
FAQs:
1. Is this project beginner-friendly?
Yes. The selected tutorial specifically describes the cover up as easy and beginner friendly.
2. Can I make it in different sizes?
Yes. The tutorial includes sizing from S to 4XL.
3. What yarn is best for a beach cover up?
Lightweight cotton or another breathable yarn is usually the best choice for comfort and drape.
4. Can I adjust the length?
Yes. You can stop earlier for a shorter tunic feel or continue longer for more of a beach dress look.
5. Is it only for the beach?
Not at all. You can also wear it poolside, on holiday, or layered over simple summer outfits.

