
This crochet bag charm is a cute little project that adds a soft handmade touch to your tote, purse or backpack. It’s the sort of quick make that’s fun, relaxing and easy to personalise.
Reasons You’ll Love This Project
This is a lovely little project to make when you want something cute, useful and quick. The finished bow is perfect for a bag accent or a little handmade gift. The tutorial is aimed at beginners.
You will have to
- Yarn.
- Crochet hook
- Scissors
- Needle for yarn
- Bag charm hardware, keyring or buckle
Use a yarn and hook size to achieve the fit and texture you want.
Best Yarn for This Project
A nice choice for a bow charm is a smooth yarn that holds its shape well. If you want it to look neat and tidy, go for something with a bit of body rather than a very fluffy yarn.
Level of Skill
Simple for beginners.
Size & Fit Guide
Make the bow smaller or larger by adjusting your yarn weight and hook size. You can also repeat sections of the bow until you get the fullness you like and then attach it to the clasp style you like best .
Stitches Employed
The tutorial includes simple beginner friendly crochet stitches as well as basic shaping.
How to Do It
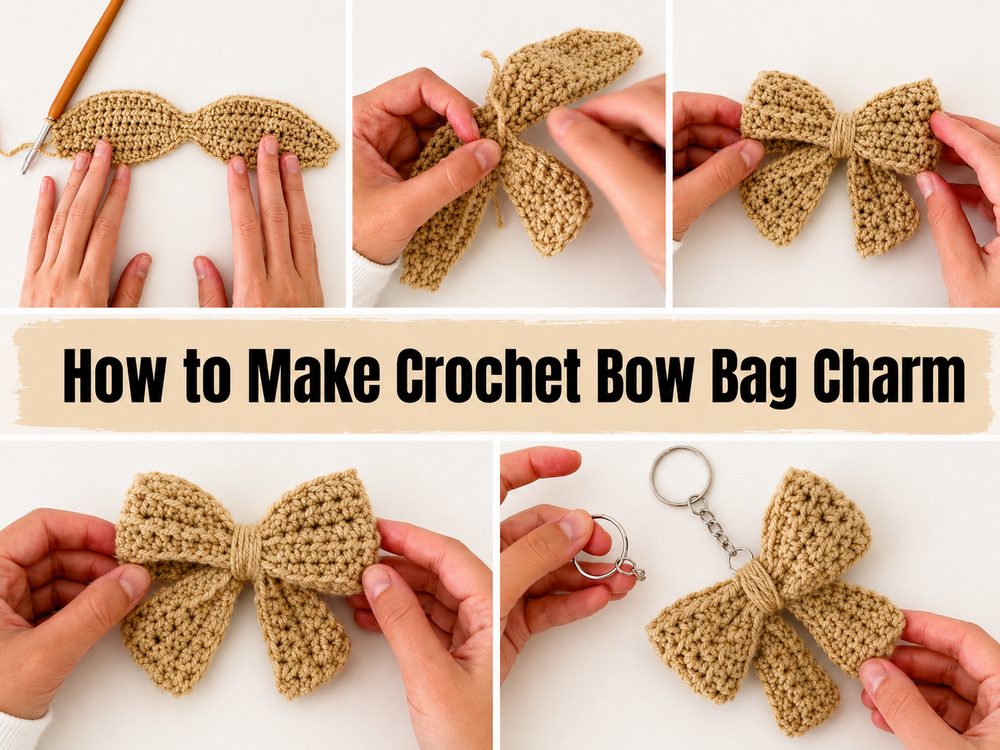
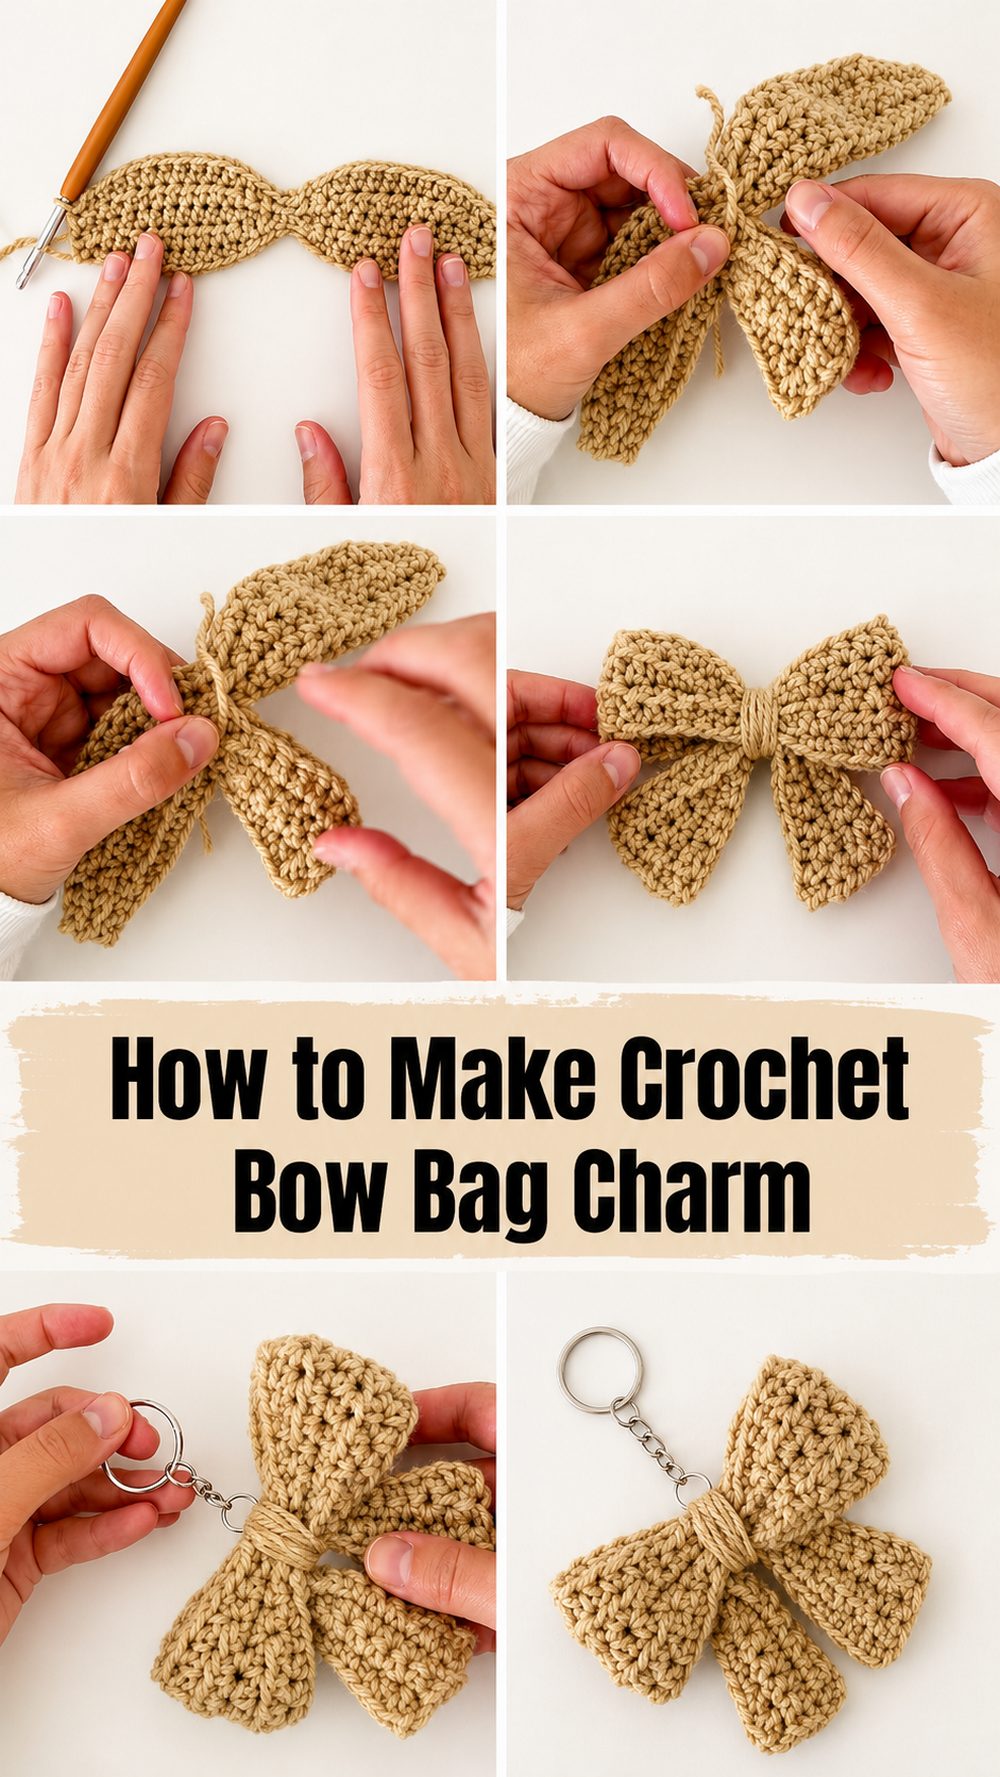
Begin the Foundation
Start with the first section that will form the base of the bow. Maintain even tension so the shape remains tidy.
Work the Main Section
Continue to shape the bow by following the tutorial. It is worked in a simple step-by-step manner that is easy to follow.
Resize image
If you want a fuller or larger bow, repeat this until you are at the size you desire. You can also blend in the yarn for a softer or more structured look.
Join Or Make
“Once your main piece is done make a bow out of it and tie the center so that it collects nicely. This is what makes the charm look finished.
Edge Finish
Carefully weave in the ends and hook the bow to your keyring or clasp so that it can hang from your bag.
Helpful Hints
- Be sure to space your stitches evenly so the bow is balanced.
- If you want to wrap the centre neatly leave a long enough tail.
- Check the shape before attaching hardware.
- If you get lost easily, use a stitch marker.
- Weave in the ends securely as bag charms get handled a lot.
Mistakes to Avoid
- Tightening one side more than the other .
- If you tighten the center too much and flatten the bow
- If you want a crisp shape, use a very slippery yarn.
- Failure to secure the hardware well
- Leaving loose ends too long
Ideas for customisation
Use pastel shades, bold bright colours or classic neutral colours. Add a bead or charm, make the tails longer or make a few bows in different sizes for a layered look.
Style recommendations
Attach to a tote bag, backpack, makeup bag or gift bag. It makes a cute handmade extra for party favours, stocking stuffers, or small thank you gifts.
Care Instruction
If necessary, wash gently in cool water. Mould when damp and lay flat to dry. Do not pull the bow tightly to keep its shape.
Time Required
This can take anywhere from a few hours depending on your speed, yarn, size and stitch pattern.
Concluding Remarks
This is a simple little project and it turns out really cute when finished. It’s a fun way to use your yarn, add personality to your bag, and create something handmade without committing to a big project.
Q&A’s
Can a beginner do this?
Yeah, it’s presented as a beginner friendly tutorial.
Can I use up yarn scraps?
Yes this is a great little project for scraps of yarn.
Can I make it into a keychain as well?
Yes, you can clip it to a keyring rather than a bag clasp.
Can I make it larger?
Use thicker yarn or bigger hook or repeat until you like the size.
A good gift?
Yes it is a cute hand-made add-on for bags, pouches and small presents.


