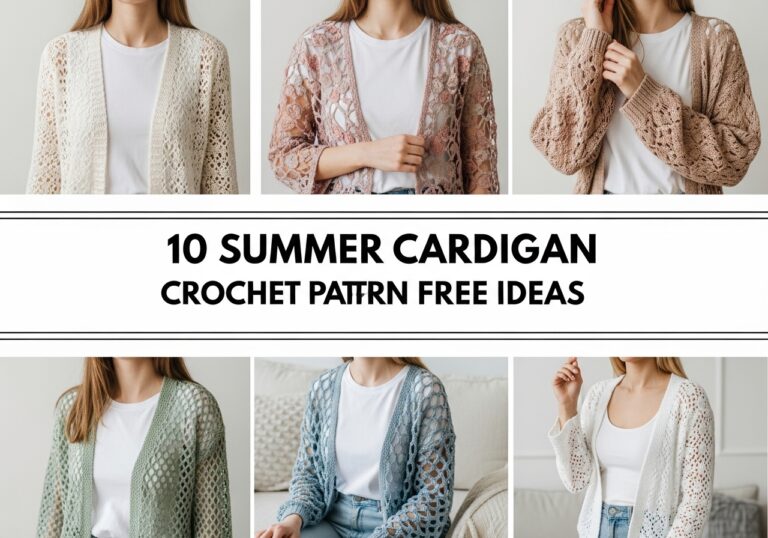
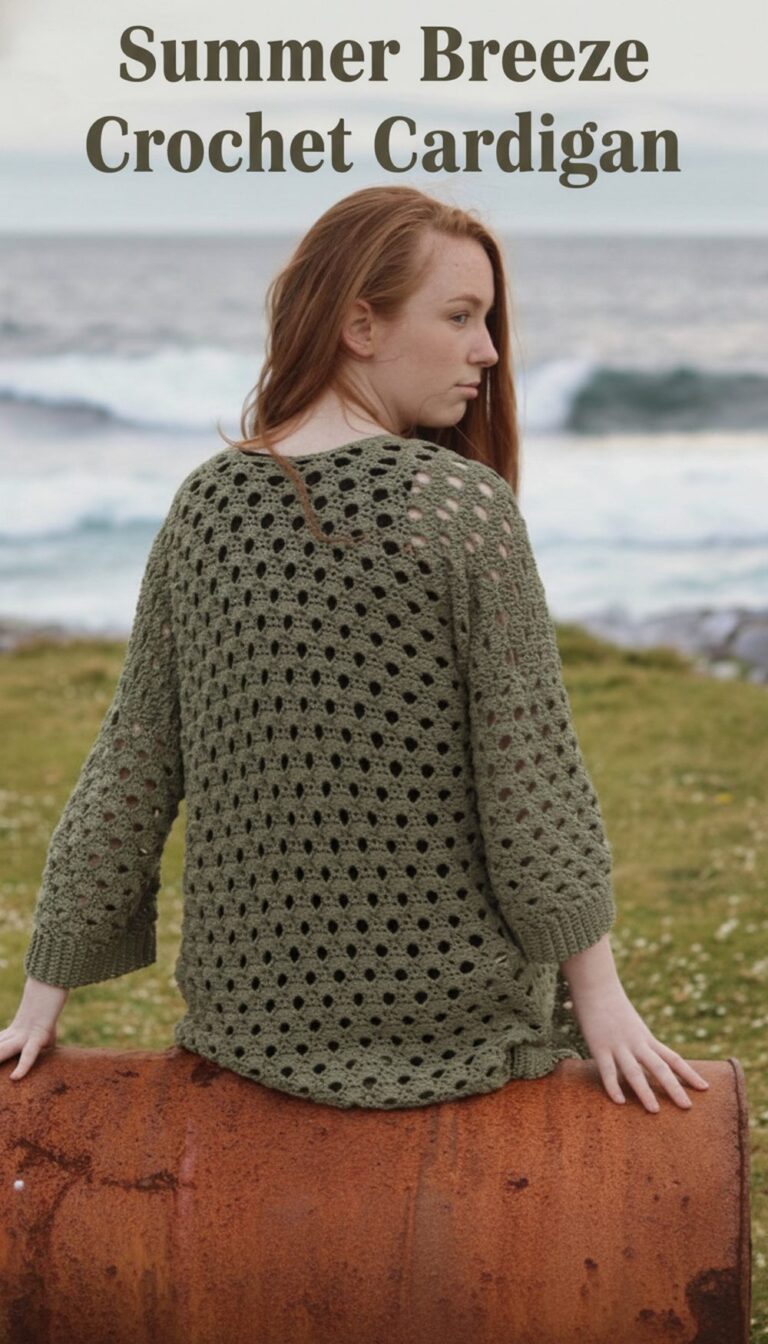
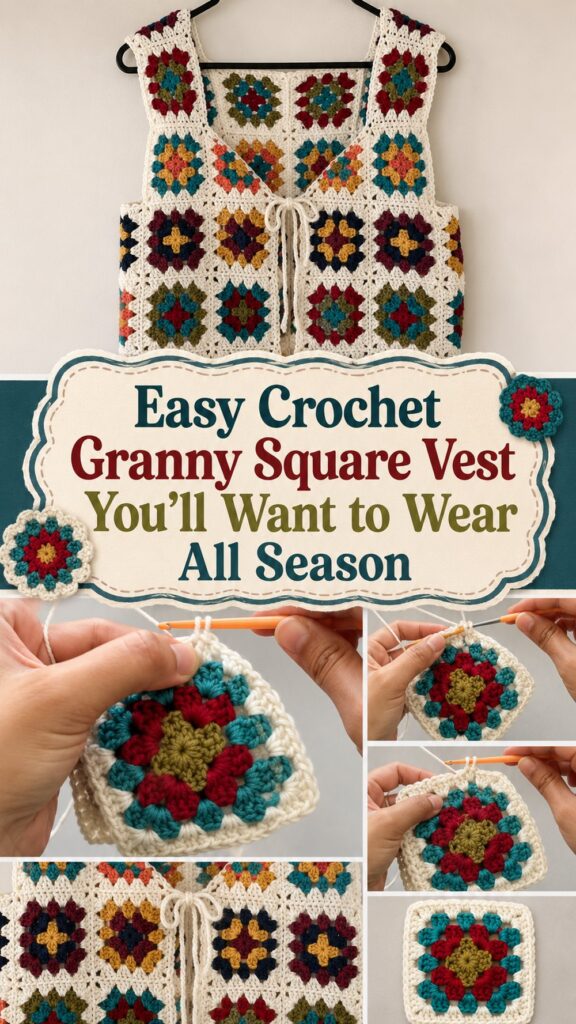
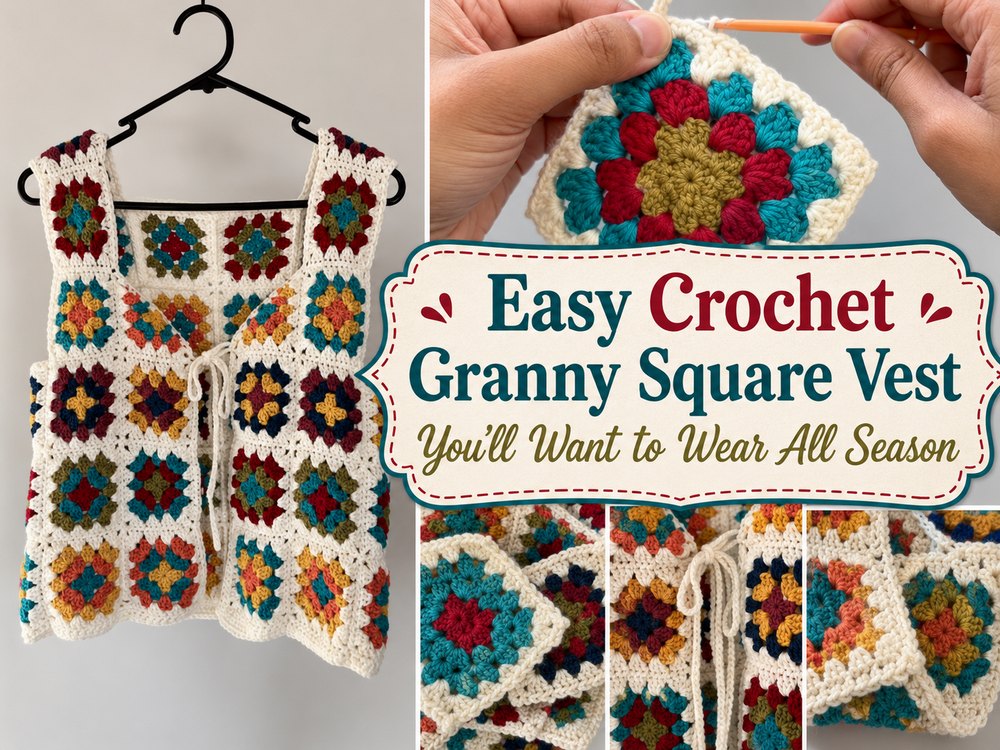
A granny square vest is such a fun way to take classic crochet and make it cute and wearable. This project has that relaxed handmade look and is a lovely choice if you want a relaxed layering piece with lots of room to play with color.
Why You’ll Love This One
The satisfaction of making this vest is that you build it up from simple granny squares and join them together to make a simple but stylish shape. It feels creative, customizable and very wearable.
Materials
- Wool Yarn
- Crochet needle
- Scissors
- Needle for yarn
Marking Stitches
Choose a yarn and hook size that will give you the fit and texture you want.
Best Yarn for this Pattern
A soft yarn with good stitch definition works great here especially to show off the granny square pattern. If you want a lighter vest, go for cotton or a cotton blend. Use acrylic or a soft wool blend for a cozier feel.
Skill Level
Size & Fadd more squares, work your squares larger, add length where needed to make it larger. Try the pieces on your body as you go, and repeat until you get the fit you want.
Stitches Used
Chain
Double crochet Slip stitch
How to do it
Lay the Groundwork
Start by crocheting the granny square panels that make up the vest. Make your tension even and if your design uses more than one square, make matching pieces.
Work the Main Section
Keep stacking your squares until they are the size you want. If the tutorial has side or shaping panels, work those next so the vest starts to take shape.
Change the Size
Lay out the pieces before joining. This makes it a lot easier to see the width, the length and where the arm openings go. Add rounds or add extra panels for more coverage.
Join or Cres
Finish the armholes, front opening and hem with a simple edging to give the vest a clean finished look. Weave in all ends neatly.
Helpful Tips
- Mark your join with stitch markers to keep your panels straight.
- Check your square size often so all your pieces stay consistent.
- Try it on before you do the final edgings.
- Block the finished vest for a neater shape.
Common Errors to Avoid
- Creating squares of varying sizes
- putting parts together in the wrong way
- Skipping fit checks as you progress
- Pulling the seams too tight
- Not securing the ends
Ideas for Customization
Go for a bright multicolor look or a soft neutral one. You can crop it , make it longer , leave it open in front or add a simple edge for a cleaner finish . A contrast border can also make the squares pop out beautifully.
Trending Styles
Team it with a simple tee, a fitted dress or a button-down. It looks lovely with jeans, skirts or layered up in cooler weather for that handmade vintage feel.
How to take care of
If necessary, hand wash in cool water. When damp, reshape and lay flat to dry. Fold it so the vest keeps its form.
Time Required
This can take a couple of hours depending on your speed, yarn, size and stitch pattern.
Conclusion
This granny square vest is a fun crochet project with a classic look and plenty of room to add your own style. It’s a lovely make to play with colour and end up with something you can actually wear.
Frequently Asked Questions (FAQs)
Can beginners make this vest?
Yes, it is a good project for beginners who are comfortable with basic crochet stitches.
Do I need to use many colors?
No, you can make it colorful or keep it all in one shade.
How do I make it bigger?
Add more rounds to the squares or repeat until you reach your desired size.
Can I make it longer?
Yes, adjust the length as needed before finishing the edging.
Do I have to block it?
It is not always required, but blocking helps the vest look cleaner and more even.