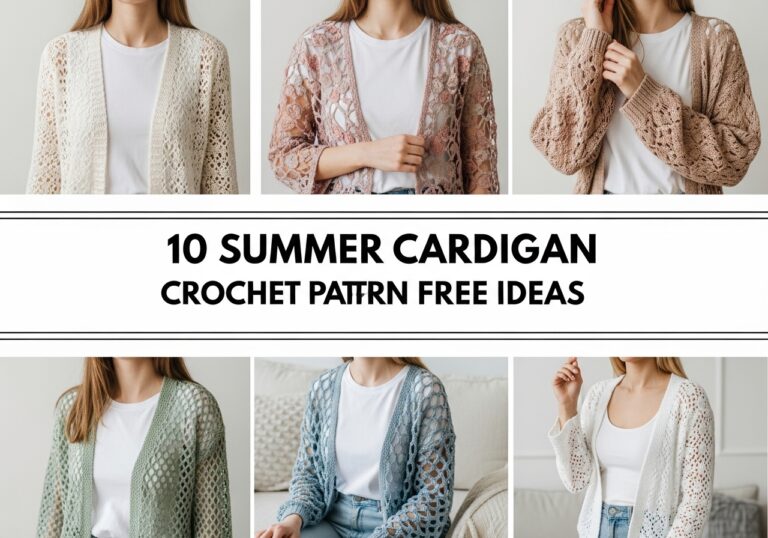
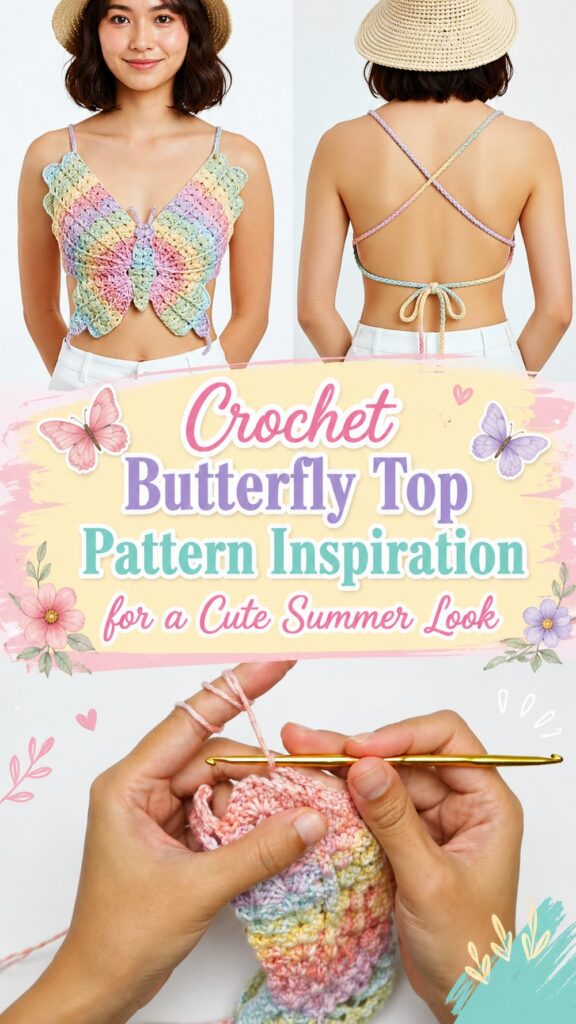
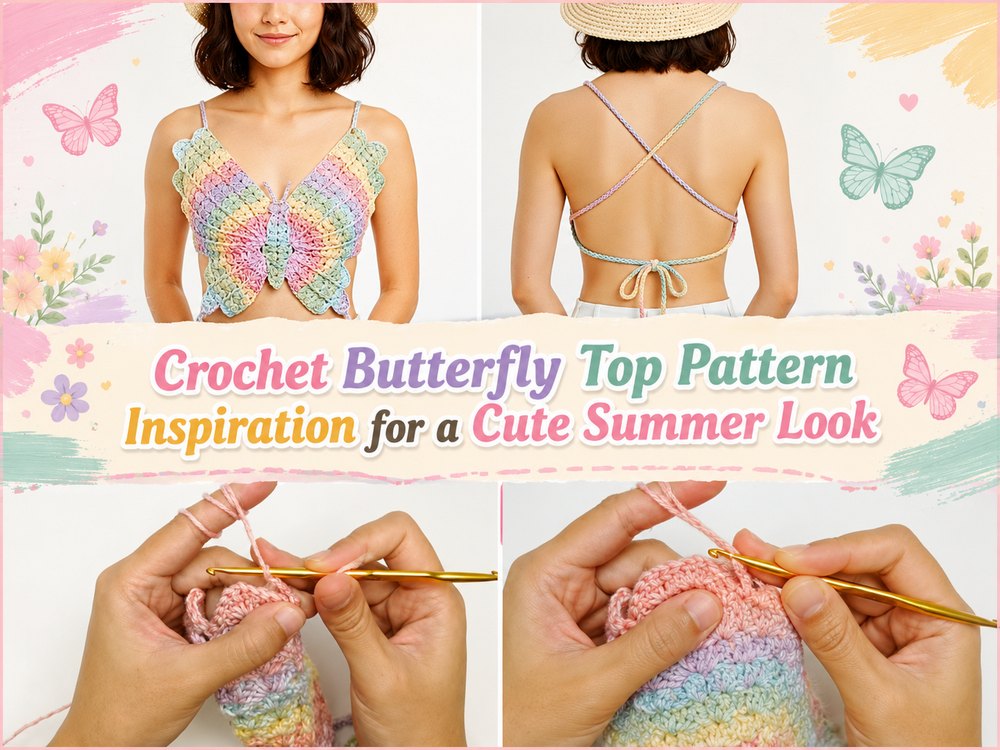
A crochet butterfly top is such a fun project to make when you want to create something light, playful and handmade. This version is a step by step tutorial on how to build the top using the wings and center body in a simple wearable style.
What You’ll Love About This Project
This is a pretty top that is eye catching and easy to personalize. It has that lovely butterfly shape people love but still feels like a practical project you can do in your own colors and fit.
What You Need
- Thread
- Crochet hook.
- Darning Needle Scissors
Choose a yarn and hook size that gives you the texture and fit you prefer.
Top Yarn for This Pattern
For a butterfly top a soft cotton or cotton blend yarn is wonderful because it gives nice stitch definition and is comfortable to wear. Choose something that isn’t too stiff so the top will hang nicely.
Skill Level
Great for beginners with confidence.
Size Guide
You can adjust the size by making the wings larger or smaller or by making the ties or straps shorter or longer. Continue until coverage and fit are satisfactory.
Stitches Brought to Use
The tutorial uses basic crochet stitches and simple shaping to form the butterfly design.
How to Do It
Initiate the Foundation
Start by drawing the first section of the butterfly shape. Work carefully, and keep your tension even so that both sides will look balanced.
Main Section Work
Open up the wings and then move into the central body section. The formed parts begin to grow and take the shape of a butterfly, and the design begins to take form.
Change the Size
Pause along the way and compare the fit with yourself or a top you already like. Add more rounds or rows for width or coverage as needed.
Join or win over
When the main shape is finished, tidy the center and add the finishing sections to make the top ready to wear.
Edge Finish
Add those final ties, straps or edge finishing as per the tutorial and then weave in all ends neatly.
Tips that help
- Keep both sides even with stitch markers.
- Check often as you go along.
- Relax your tension so the fabric doesn’t pull.
- Weave in ends securely, especially around center.
- Blocking out light can give the wings a cleaner look.
Mistakes to Avoid
- To make one side bigger than the other
- Sewing the stitches tighter
- Skipping fit checks along the way
- Leaving loose ends hanging
Customization Ideas
Pick a solid color for a clean look or bright colors for a more playful butterfly style. You can add a simple edging, lengthen the ties or change the coverage to suit your style.
Design Inspiration
This top looks great with denim shorts, a maxi skirt or layered over a simple summer look. It also makes a cute festival piece or beach cover up style top.
Care Instructions
Gently wash in cool water, reshape when damp and lay flat to dry. Rough washing will spoil the neat shape.
Time Required
This can take a couple of hours depending on your speed, yarn, size and stitch pattern.
Conclusion
If you’re after a crochet project that is both creative and wearable, a butterfly top is a really fun one to try. Looks pretty, can be customized, and is rewarding to watch take shape in your hands.
FAQs
Is this butterfly top beginner-friendly?
Yes, it looks best for confident beginners who are comfortable with basic crochet and simple shaping.
Can I make it bigger or smaller?
Yes, you can adjust the size by changing the wing size and overall coverage.
What yarn works best?
Soft cotton or a cotton blend is a great choice for comfort and shape.
Can I use more than one color?
Yes, this project can look beautiful in one color or in a mixed color design.
Do I need exact measurements?
No, you can adjust the fit as you go until it feels right for you.