Beginner-Friendly Crochet Octopus Plushie
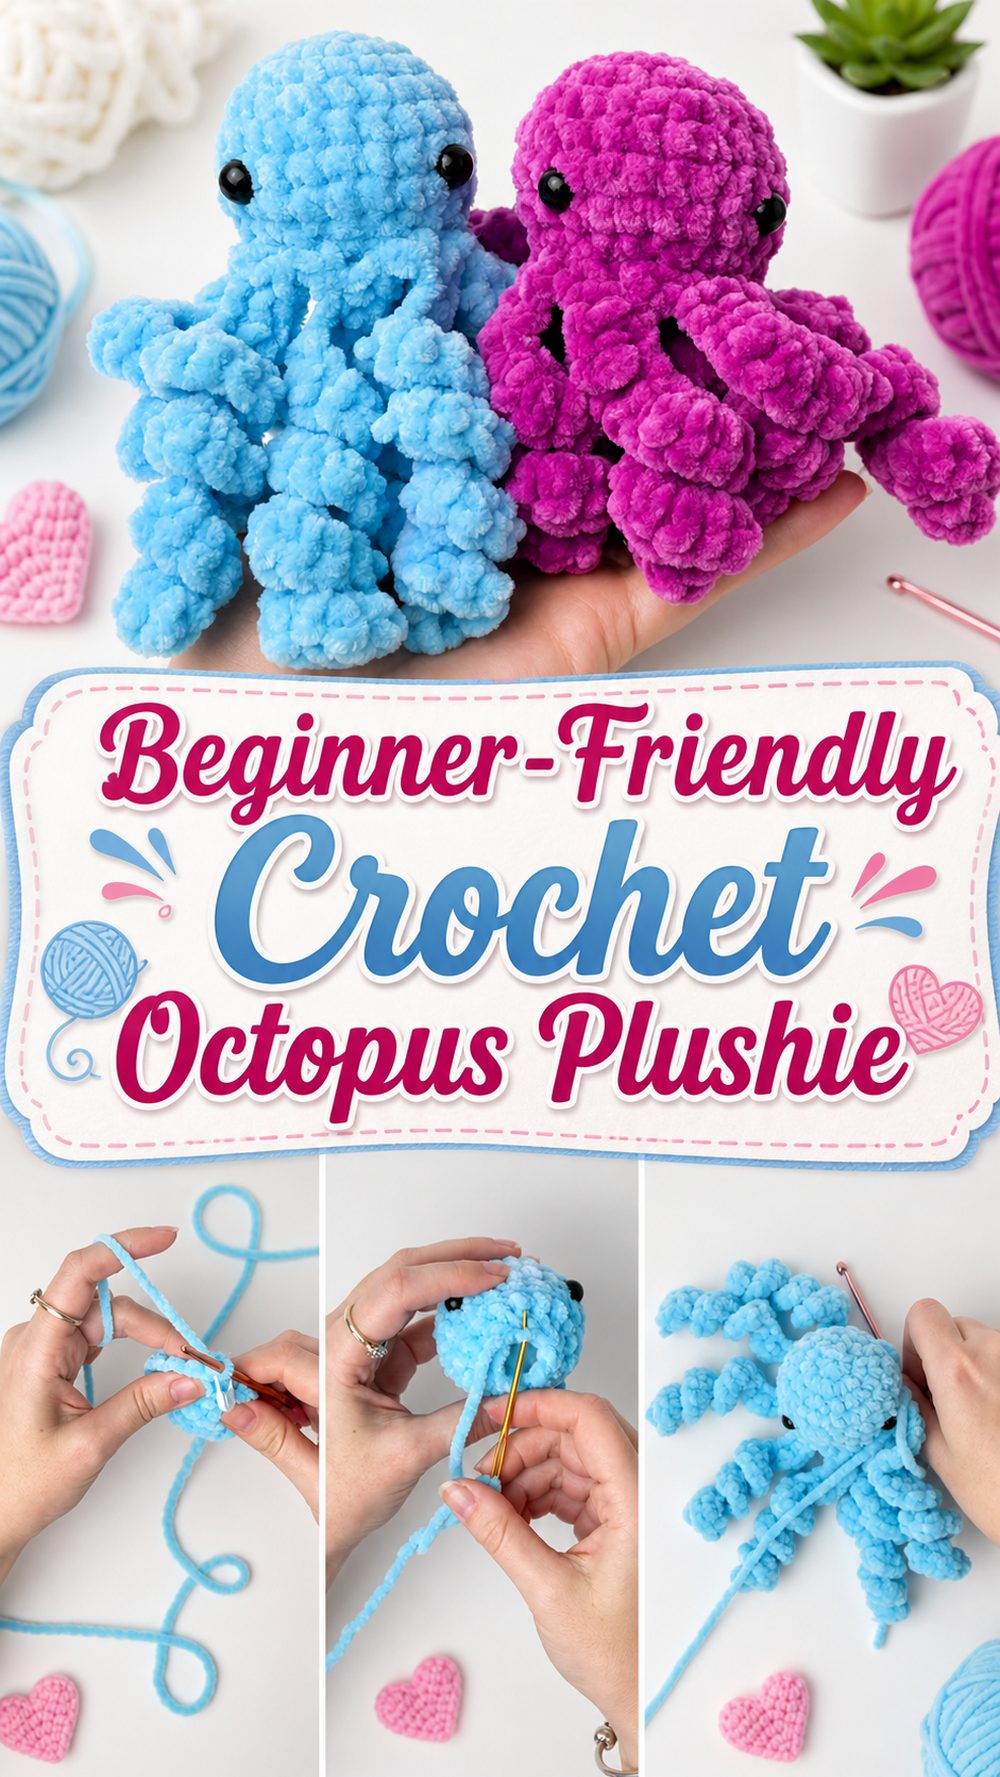
A crochet octopus is one of those projects that always looks adorable the moment it starts taking shape. It has a soft rounded body, curly little tentacles, and that playful handmade charm that makes amigurumi so fun to crochet. For this one, I chose a full YouTube octopus tutorial that is clearly presented as a full step-by-step tutorial and described as suitable for beginners, which makes it a lovely choice if you want a plushie that feels manageable but still very cute when finished. The finished octopus has that sweet, giftable look that works well for children, desk décor, nursery shelves, or a cheerful handmade present. It is also the kind of project that feels satisfying because you can see the character come together quite quickly. Once the round body and tentacles are in place, it really starts to look like a proper little plush friend.
Why You’ll Love This Project
This octopus is fun to make because it gives you a full plushie result without feeling overly complicated. The selected video is specifically described as a full tutorial and says the pattern is suitable for beginners, so it is a great pick for crocheters who want something cute, clear, and approachable.
Materials Needed
- Soft yarn or plush yarn
- Crochet hook
- Scissors
- Yarn needle
- Stitch marker
- Toy stuffing
- Safety eyes or stitched facial details
Use a yarn and hook size that matches your desired fit and texture.
Best Yarn for This Project:
A soft smooth yarn works very well for an octopus because it helps the body and tentacles keep a neat shape. If you want a softer, squishier plushie look, plush yarn can be lovely. If you prefer being able to see your stitches clearly, a smooth acrylic or cotton blend is often easier to handle. For a toy like this, the nicest result usually comes from yarn that feels gentle in the hand and gives the body a rounded, tidy finish.
Skill Level:
This project is beginner-friendly to confident beginner. The selected tutorial is explicitly presented as a full step-by-step tutorial and says the pattern is suitable for beginners, which makes it a comfortable choice for someone still building confidence with plushies.
Size and Fit Guide:
Because this is a plushie, the size is flexible. You can make it smaller with lighter yarn and a smaller hook, or create a chunkier octopus with thicker yarn. The main thing is to keep the body nice and round and the tentacles balanced so the finished toy still looks proportioned and cute.
Stitches Used:
The selected video is a beginner octopus amigurumi tutorial, so it relies on simple plushie-style crochet construction rather than garment shaping or lacework. Expect basic stitches used for building a rounded body, shaping the toy, forming the tentacles, stuffing, and finishing neatly.
How to Make It
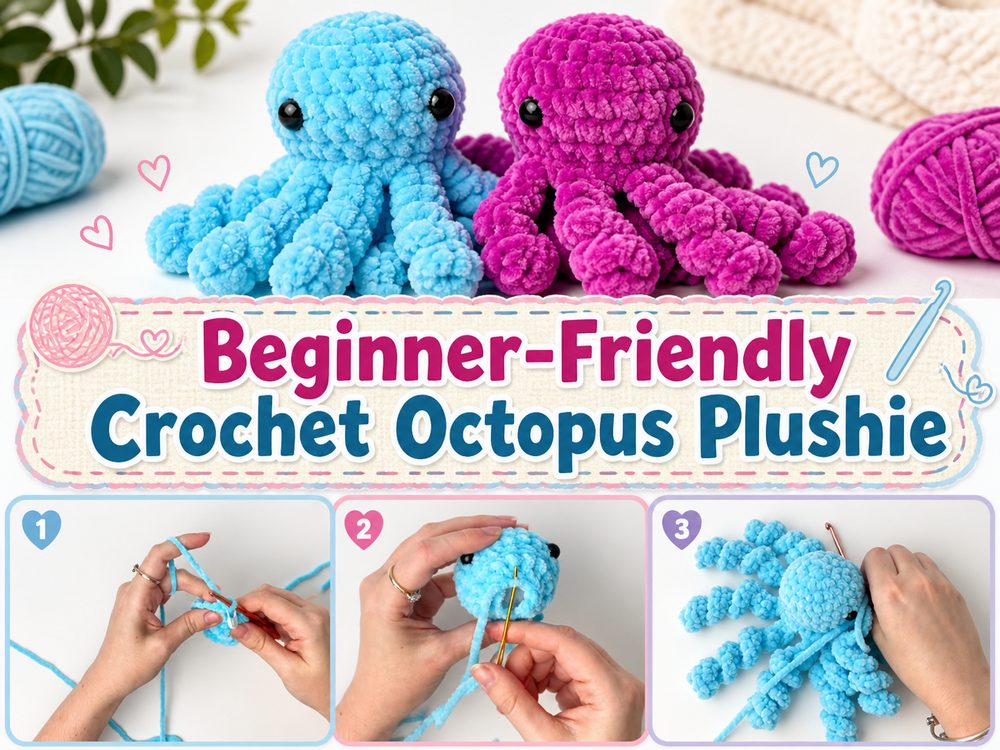
Step 1: Start the Main Body
The octopus begins with the rounded top section, which becomes the main body of the plushie. This part matters a lot because the body sets the whole look of the toy. A crochet octopus usually looks best when the head is evenly shaped and softly rounded rather than too flat or too stiff.
At the beginning, keep your stitches even and use a stitch marker so you do not lose your place. Plushies are small enough that changes in tension can show quickly, so it helps to go slowly through the first rounds. If the stitches are too loose, the stuffing may show later. If they are too tight, the body can feel hard instead of soft and cuddly.
Step 2: Build the Rounded Shape
Once the top is established, continue working the body so it grows into that classic octopus shape. This is the part where the project starts to feel exciting, because you can already see the plushie beginning to form. A nice octopus body should feel balanced and smooth in your hands.
As you crochet, pause now and then to check the shape. Turn it from side to side and make sure it still looks even. If one section starts widening more than the rest, it is easier to fix early than after the stuffing is added. A little attention here makes the final plushie look much neater.
Step 3: Shape the Lower Section
After the rounded body is built, the lower area starts setting up the playful octopus style. This is the transition point where the plushie begins moving from a simple rounded piece into something more character-like. Work steadily here and keep the stitches consistent so the lower section stays tidy.
This stage is also a good time to think about the overall size. If you want a tiny octopus, keep the body compact. If you want a more cuddly desk plushie or gift toy, you can let the body feel a little fuller. The important thing is that the body still supports the tentacles nicely once they are added.
Step 4: Create the Tentacles
The tentacles are what really make the octopus feel playful and recognizable. They give the plushie its cute movement and help turn a simple round body into a finished little sea creature. In a beginner-friendly octopus tutorial, the tentacles are usually made in a simple repeated way so the process feels manageable rather than confusing. The chosen video is specifically presented as an easy full tutorial for beginners, so the construction is meant to be approachable.
Try to keep the tentacles as even as possible so the finished toy looks balanced. They do not need to be perfectly identical to be cute, but a similar size and curl gives the plushie a cleaner look. If your tension changes, one tentacle may end up tighter or longer than the others, so it helps to work calmly and count carefully.
Step 5: Add the Face
The face is where the octopus really comes to life. A simple face usually works best for this kind of plushie. You do not need lots of extra detail. A pair of eyes and a tiny expression can be enough to make the toy feel sweet, cheerful, and handmade.
If the octopus is for a baby or very young child, stitched features are often a softer choice. If it is for display or for an older child, you can finish the face in your usual preferred style. Before attaching anything permanently, hold the face placement in position and check it from the front. Even small changes can affect the whole expression.
Step 6: Stuff the Plushie
Before closing the body, add stuffing little by little. This gives you much better control over the final shape. The octopus should feel full enough to stay round, but still soft enough to squeeze. Stuffing added too quickly can create lumps, while too much stuffing can stretch the stitches and make the body feel too firm.
Take a little time here and smooth the stuffing around with your fingers. Pay attention to the upper curve of the body so it keeps that soft dome shape. A nicely stuffed plushie always looks more polished and feels more satisfying in the hand.
Step 7: Close and Finish
Once the body is stuffed and the tentacles are complete, close the opening neatly and weave in all ends carefully. This final stage is what makes the toy feel complete. Check that the body looks even, the face feels centered, and the tentacles sit nicely underneath.
The finished octopus should look soft, round, and cheerful, with a cuddly body and balanced tentacles. Since the selected video is clearly labeled as a full tutorial and beginner-suitable, it is a strong choice for making a plushie that feels approachable and gift-worthy.
Helpful Tips
- Use a stitch marker from the very first round.
- Keep your tension even so the stuffing does not show through.
- Add stuffing gradually instead of all at once.
- Check the body shape before finishing the face.
- Keep the tentacles as even as you can.
- Weave in ends securely for a cleaner plushie finish.
Common Mistakes to Avoid
- Crocheting too loosely and leaving gaps in the body.
- Overstuffing the octopus and making it too firm.
- Understuffing and ending up with a floppy shape.
- Letting the tentacles become uneven in size.
- Rushing the face placement.
- Forgetting to check the plushie shape before closing.
Customization Ideas
This octopus is easy to personalize. You can make it in soft ocean shades like aqua, blue, lavender, or mint, or go with bright cheerful colors for a playful toy look. Pastels give it a sweet baby-gift feel, while bold colors make it more fun and lively. You could also add a tiny blush detail with yarn, make a mini version for a small gift, or create a larger plushie with thicker yarn for a more cuddly result.
Style Ideas
A crochet octopus looks lovely on a nursery shelf, tucked into a gift basket, or given as a small handmade toy. It also works nicely as a desk companion or a cheerful shelf decoration in a craft room. If you enjoy making themed gifts, you could pair it with a crochet blanket, a sea-themed plushie set, or a few mini ocean friends in matching colors.
Care Instructions
Hand wash gently in cool or lukewarm water with mild soap. Press out extra water carefully without twisting the plushie, then reshape it and let it dry fully. Avoid high heat and rough washing so the stuffing and shape stay nice.
Time Needed
This may take a few hours depending on your speed, yarn, plushie size, and stitch tension.
Conclusion
A crochet octopus is such a fun plushie to make because it is cute, expressive, and beginner-friendly without feeling boring. This selected YouTube tutorial stands out because it is presented as a full step-by-step tutorial and clearly says it is suitable for beginners, which makes it a great choice for an easy handmade toy project. Take your time with the body, keep the tentacles even, and enjoy making a little octopus that feels playful, soft, and full of personality.
FAQs
Is this beginner-friendly?
Yes. The selected tutorial is described as a full step-by-step tutorial and says the pattern is suitable for beginners.
What yarn is best for a crochet octopus?
Soft smooth yarn is great for seeing stitches clearly, while plush yarn gives a softer cuddly finish.
Can I change the size?
Yes. You can make the octopus larger or smaller by changing the yarn, hook, and overall body size.
How do I keep the tentacles neat?
Work them carefully with even tension and try to keep each one similar in size and curl.
Can I give this as a gift?
Yes. A crochet octopus makes a sweet handmade gift for children, nurseries, or anyone who loves cute plushies.