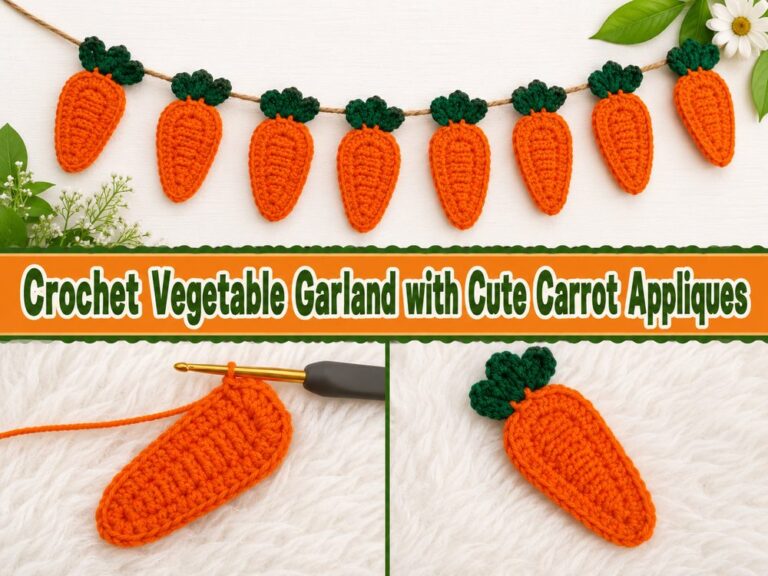
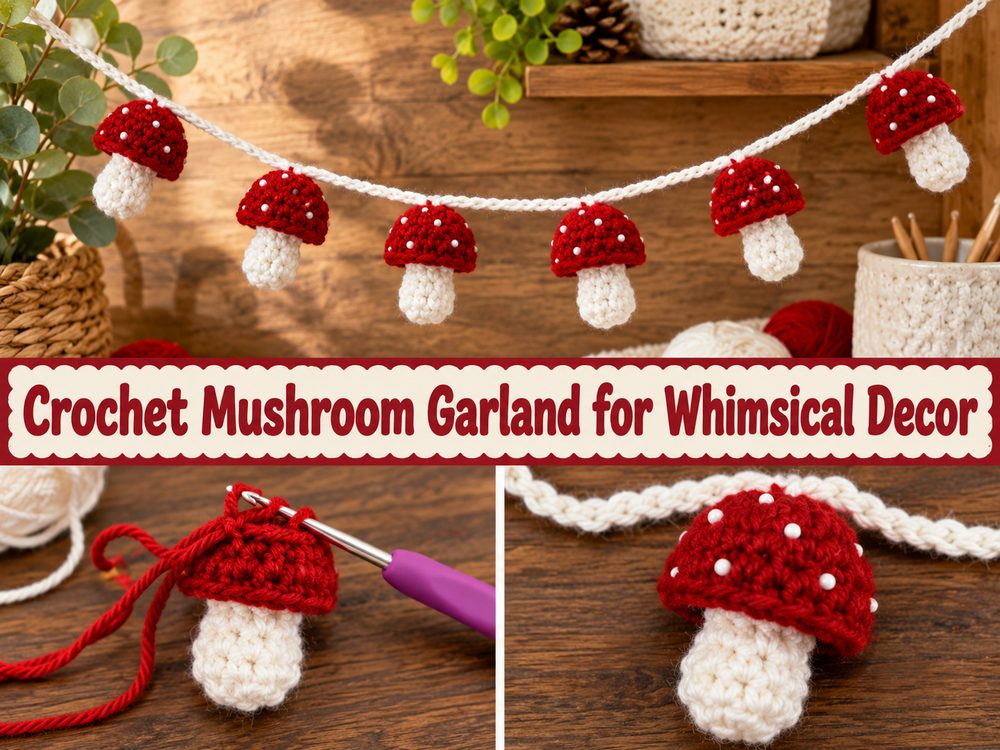
Crochet Mushroom Garland for Whimsical Decor
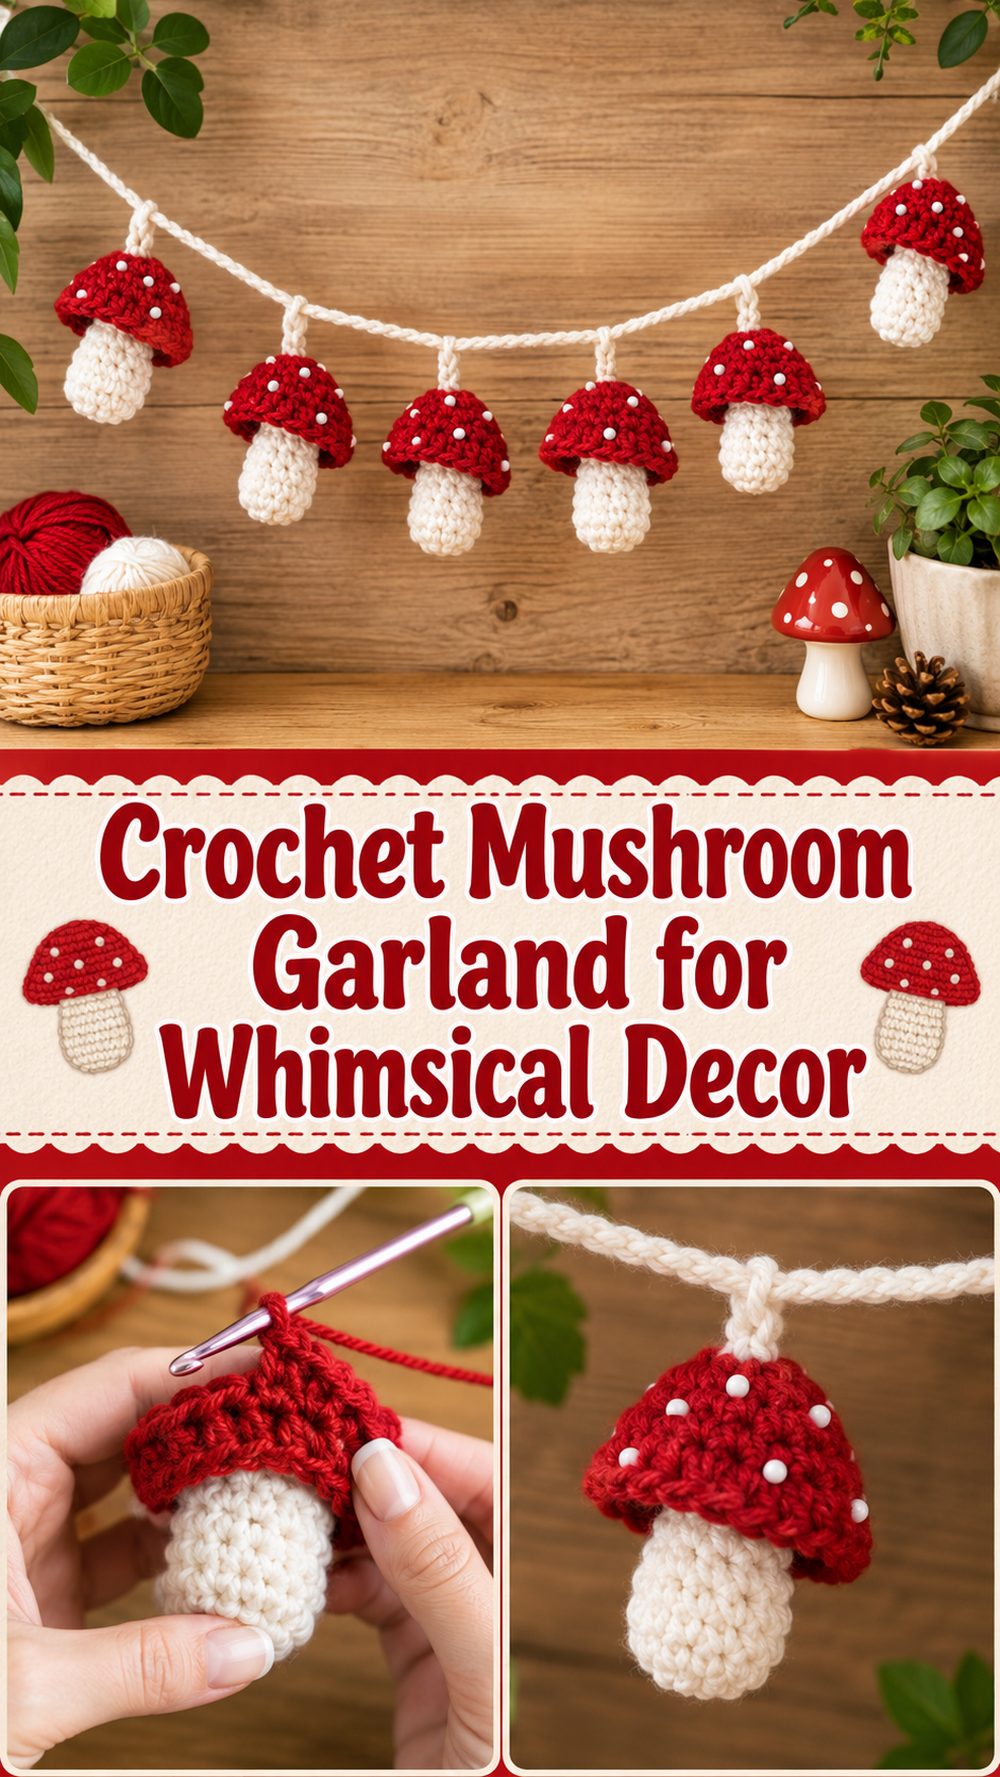
Working a crochet mushroom garland is one of those from-start-to-finish fun projects. It has that cosy woodland charm perfect for a craft room, nursery, reading nook, seasonal display or anywhere you want a soft handmade touch. The fun thing about this kind of garland is that each mushroom is small enough to complete without feeling like a huge commitment, but when you string several up together the end result looks decorative and special. It’s also a lovely project for anyone that loves cottage style crochet, small appliques or easy pieces for using in new ways. The tutorial I chose is a YouTube step-by-step project for crochet mushrooms that can be strung together to make a garland, and the maker also says that they can be used as appliques or hung around the house.
Why you’ll love this one
What’s so fun about this project is that you end up with a cute decorative finish without needing a lot of yarn or much of a time commitment. Each mushroom is a cute little appliqué on its own, but string several together and you have a cheerful garland of handmade decor. This tutorial is especially interesting because it is based on mushrooms that can be strung into a garland or used separately.
Supplies Needed
Yarn for the caps of mushrooms
Yarn for stems
Crochet hook.
scissors.
Yarn needle
Stitch markers if you like to keep track of your shape.
String, cord or twine to hang the finished garland
Select a yarn and hook size that will give you the fit and texture you want.
Best Yarn For This Pattern:
A smooth yarn is particularly good for a mushroom garland because it shows the shape of the cap and stem. Cotton is beautiful if you want a nice tidy crisp decorative finish. You can also get a nice smooth acrylic if you want something softer and easier to work with. Cream tones, earthy shades and classic mushroom reds all work beautifully for a quirky woodland vibe.
Level of skill:
This is easy to . beginner friendly
The video selected is a tutorial for creating mushrooms to be attached to a garland, so it is appropriate for crocheters comfortable with basic crochet handling and wanting to make a small decorative item with simple shaping.
Size & Fit Guide:
It is a garland so the size is very flexible. You can make tiny mushrooms for a delicate hanging strand, or slightly larger ones for a bolder display. You can also vary the amount of mushrooms depending on where you want to hang it. Lay out the pieces on a table before you assemble them so you can check the spacing and overall length.
Stitches used:
The tutorial is described as a crochet mushroom project that is a simple step-by-step but the search snippet does not list the exact stitch menu. It depends on the project, but it involves basic crochet stitches, simple shaping and easy finishing rather than advanced techniques.
How to Make It
Step 1: Begin with the Mushroom Pieces
The single mushroom motifs start this garland. The video teaches mushrooms that can be linked into a garland later on, so the best way to approach this is to think of each as a small finished piece first. That makes it seem very doable because you’re not dealing with a long piece right at the beginning. Just focus on one cute mushroom at a time.
The main shape is the first part of each mushroom. Work towards a neat outline that looks balanced and tidy. The mushrooms are hung side by side so keeping the first one neat gives you a great visual sample for all the others .
Step 2: Create the Cap
The charm of the mushroom is the cap. This is the part that makes the project feel whimsical and decorative, rather than plain. Try to keep the cap smooth & rounded so it has that nice hand made look. If you want to go for a classic toadstool style, bold cap colours look lovely but softer earthy shades can also make for a beautiful woodland feel.
Once you have finished your first cap, take a moment to look at the overall size. Is it the right size for the spot you want to hang it? Small mushrooms are great for decorating a shelf or a small wall area. A slightly larger motif may be a better fit for the project if you want them to stand out on a mantel or larger space.
Step 3: Attach the Stem
After the cap the stem gives the mushroom its familiar shape. This part should be centred and supportive under the cap so that the finished motif feels balanced. Keep it simple and clean. – Because this is decorative crochet, a simple stem is usually more pleasing to the eye than a stem that is too fussy.
Here is also where the mushroom really starts to come together. With the stem in place it is so much easier to imagine how cute a whole row of them will look hanging together.
Step 4: Neatly Finish Each Mushroom
Then tidy up the ends and fasten off. Now you can move on to the next one. This makes it easier to organise the garlanding process later. It’s much easier to put together a nice clean row of motifs when each mushroom is already finished and tidy.
In the selected tutorial, it is also mentioned that these mushrooms can be used as appliques or just hung around the house, meaning the pieces are still useful before being put together into a full strand. That makes this project feel super flexible.
Step 5: Create More Matching Mushrooms
Make your first mushroom and then let it be your guide to the others. They don’t need to be the exact same size but keeping them similar in size makes the finished garland look more polished. A little variation is still part of the handmade charm, especially in a woodland style project like this one.
This is a good project for batch making . First do some caps, then the stems, and then finish all the ends together. That kind of rhythm makes the process feel relaxed and fun.
Step 6: Design the Garland Layout
Prior to attaching, lay all your finished mushrooms out in a line. This is the best way to determine how much space you want between them. Closer spacing makes the garland look more decorative and fuller. More space between lines makes the text look lighter and a little more open.
You might also consider the order of colours here. A repeating mushroom colour scheme feels neat and coordinated, while a mixed scheme can feel more playful and cottage-inspired. Either way it’s good to test out the layout first, instead of attaching everything.
Step 7: Thread the mushrooms onto the string
Once you’re happy with the layout, attach each mushroom to a piece of yarn, cord, or twine. Use a matching yarn for a soft coordinated look, or a simple cord or rustic twine for a more natural handmade style. The tutorial is based on mushrooms that can be connected into a garland, so the assembly is part of what makes the project so versatile.
Make sure the mushrooms are hanging evenly, and facing forward. This makes a HUGE difference when the garland is displayed on a wall, shelf, or window.
Step 8: Finishing Touches
Hold the garland up with everything attached and take a look at the balance. See if some mushrooms need to be moved a little closer together or farther apart. Trim off any loose ends and press the motifs flat with your fingertips.
If any of the mushrooms have curled edges, a light block can help flatten them out. This is especially useful if you want the garland to look tidy in photos, gifts or seasonal displays.
The end result should be soft, whimsical and a little storybook-y. This is the sort of crochet decor that makes a room warm instantly.
Tips & Tricks
First make one mushroom, and use this as a visual guide for the rest.
Keep cap and stem proportions similar for a neat looking garland.
Work in ends before assembly so the last strand stays tidy.
Before attaching everything, test the spacing on a table.
Use smooth yarn so the mushroom shape is clear.
Light blocking can help motifs hang more evenly.
Common Errors to Avoid
Intentionally varying the size of each mushroom very much
Hurrying the end and leaving chunky ends on the back
Choosing a hanging strand that appears too thin or too stretchy
Not checking the full layout and spacing the mushrooms unevenly
Making the motifs too big for the place where you want to display them
Forgetting to support the garland when it is being fixed in place
Ideas for Customisation
You can make this garland very personal with a few small tweaks. Choose classic red-and-cream mushrooms for a woodland look, soft neutrals for cosy decor or playful pastel shades for a nursery or reading nook. And you could add in little leaves or flowers or acorns later on to make the strand feel fuller. Another cute idea is to use a couple mushrooms as single appliques on bags, baskets or giftwrap and make the rest into the garland.
Style Inspiration
A crochet mushroom garland is perfect above a book shelf, across a nursery wall, over a craft table or even on a seasonal mantel. It also works for cottage style rooms, woods party decor and cosy autumn decor. A shorter one would be great for gifting tied to a basket, a wrapped handmade gift or a little room decor bundle.
Information of Care
If the garland requires cleaning, a gentle hand wash is usually best. Spread the mushrooms out flat to dry. Do not use high heat. Smooth out motifs gently while damp if they are not holding their shape and dry flat before hanging again.
Time Needed
Depending on your speed, yarn, size and how many mushrooms you want in the finished garland this could take a couple of hours.
Conclusion
A crochet mushroom garland is such a charming little project when you want something decorative, creative, and easy to enjoy. It gives you the satisfaction of finishing small motifs, then rewards you with a full handmade display once everything is joined together. You can keep it simple, play with color, or use the mushrooms in other ways too. It is the kind of project that adds warmth and personality wherever you hang it.
FAQs
Is this beginner-friendly?
Yes, it looks suitable for beginners or confident beginners who are comfortable making small crochet motifs and finishing them neatly.
Can I use the mushrooms for something other than a garland?
Yes. The selected tutorial notes that the mushrooms can also be attached as appliques or hung around the house on their own.
What yarn works best for this project?
A smooth yarn is usually best because it helps the cap and stem shape stand out clearly.
Can I adjust the size?
Yes. You can change the look by using different yarn weights, hook sizes, and by deciding how many mushrooms to include in the strand.
How do I make the garland look neater?
Keep the motifs similar in size, weave in ends before assembly, and test the spacing before attaching them permanently.