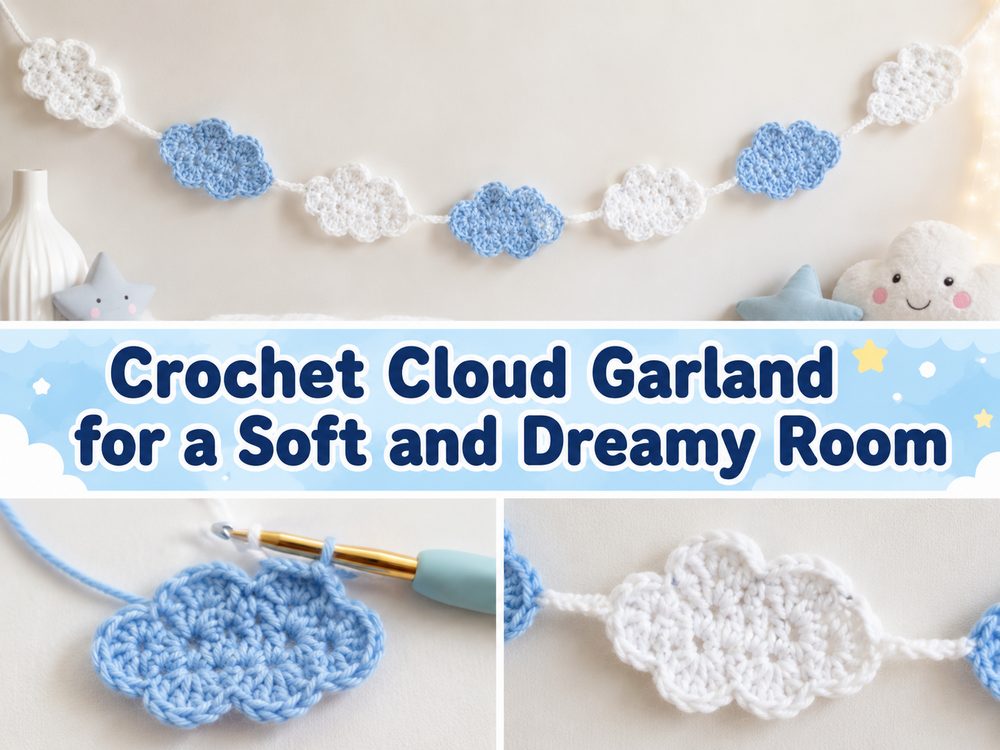
Crochet Cloud Garland for a Soft and Dreamy Room
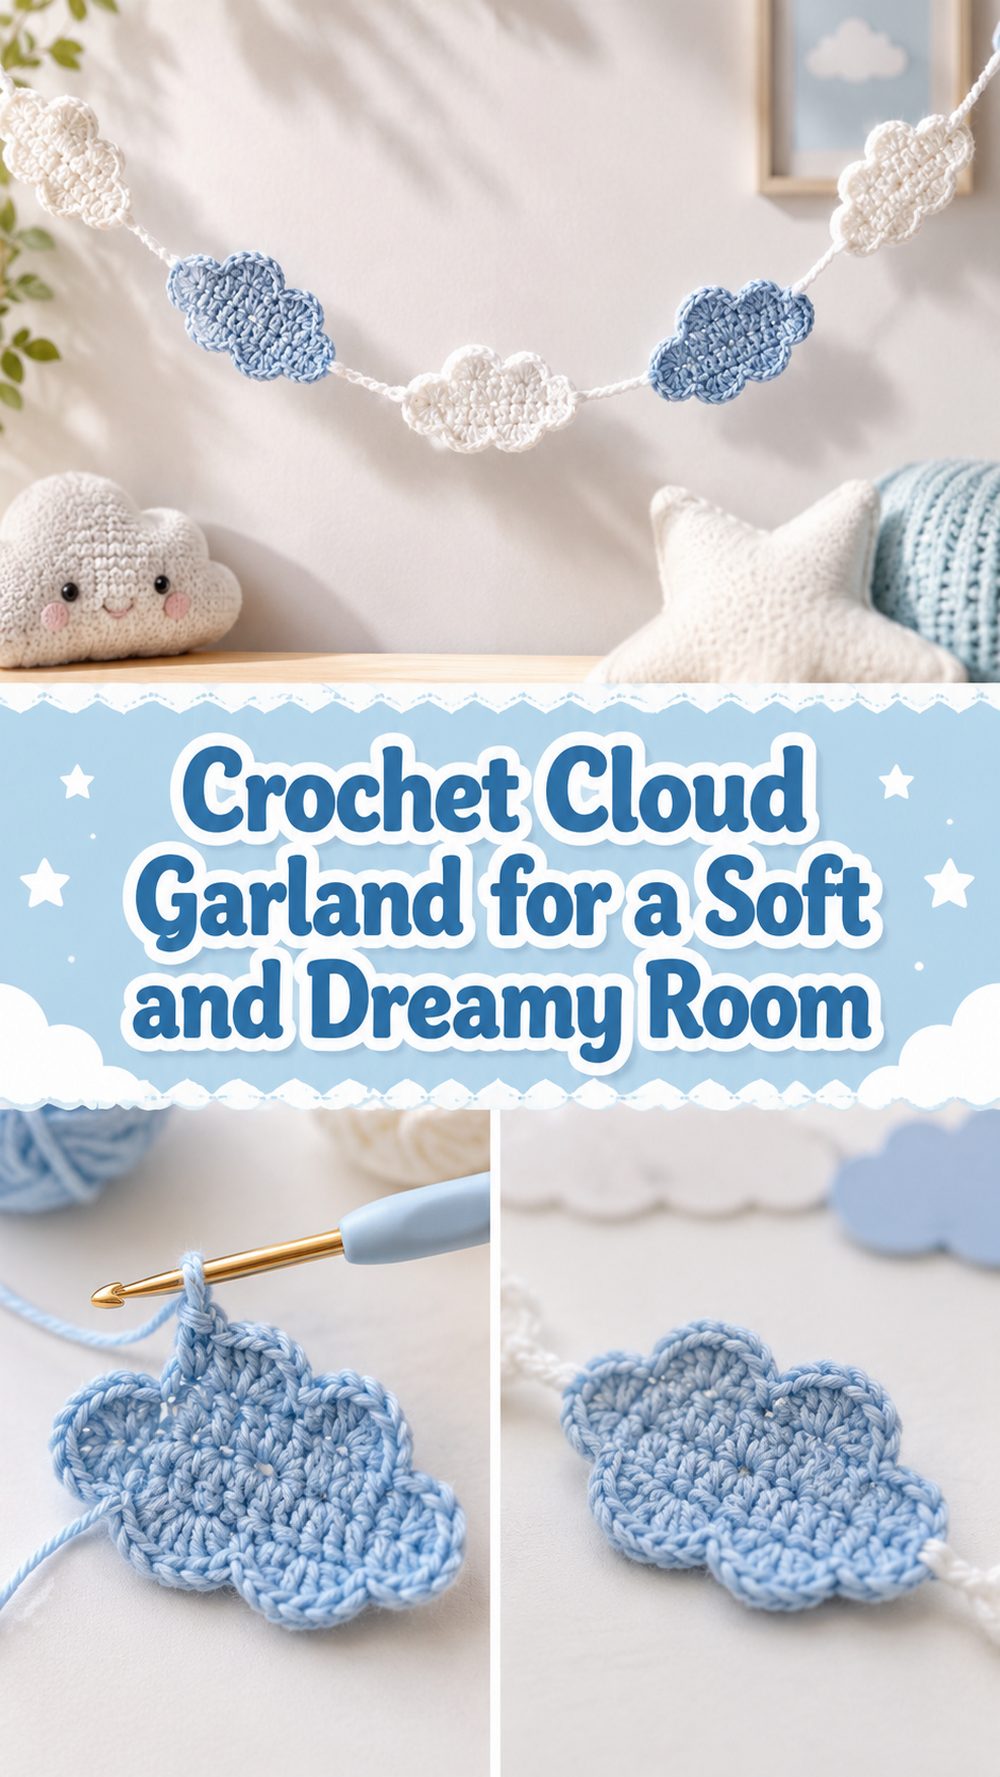
One of those sweet little projects that can make a room feel softer right away is a crochet cloud garland. It has a peaceful, fun look that looks great in nurseries, bedrooms, reading nooks, party backdrops or cosy craft rooms. The beauty of this project is that it looks light and simple, but when the clouds are finished and strung together, it’s a thoughtful and decorative effect. And it’s a lovely project for when you want something cute, but don’t want to commit to a big blanket or wearable. The small cloud motifs are easy to repeat, perfect for soft colouring and relaxing to make. The tutorial I selected is a direct YouTube video “Crochet Cloud Garland” and is a good fit for this project and insinuates a cloud design that is made for garland use.
Why you will love this project
This project is great because it is simple, peaceful and easy to repeat. When you finish one cloud the rest are usually much easier and the full garland is put together in a very satisfying way. It’s also the kind of decoration that works in a lot of spaces without feeling too heavy or busy.
Materials Required
Yarn for the clouds: white, cream or pastel.
Hook (Crochet)
scissors.
Yarn needle.
If you want to keep track of your shape, stitch markers
Yarn, cord or twine for stringing the garland
Measuring tape if you want a particular length at the end
Choose a yarn and hook size that will give you the fit and feel you want.
The Best Yarn to Use for This Project:
For a cloud garland, a soft, smooth yarn is perfect. If you are looking for neat and defined clouds, cotton or a cotton blend can be a lovely choice. If you want them to look soft and cosy a light acrylic or baby yarn can give a soft finish. Pale colours are usually especially good for this project, keeping your clouds looking airy and calm.
Skill Level:
Easy to beginner.
It’s a nice project for someone who knows the basic crochet stitches and wants to practise shaping small motifs and repeating them evenly. The video we selected is specifically for a cloud garland, so it is geared towards making a decorative motif instead of a complicated construction.
Size & Fit Guide:
The size is very versatile. You can make small clouds for a delicate nursery garland or large clouds for a bold wall display. The finished length can be varied by making more or less motifs and by varying the spacing between the motifs. Lay out the clouds on a table to decide how full you want the garland to look before you attach everything.
Stitches to Use:
The result is clear that this is a project of a crochet cloud garland but no mention of the specific stitches used in the search snippet. Perhaps the easiest way to think of this kind of flat decorative motif is as a single cloud shape, made with basic crochet stitches, soft shaping, and simple finishing.
How to Make It
Step 1: Launch the First Cloud
Concentrate on one cloud motif first and then on the whole garland. It makes the project so much more manageable. You can focus on one soft cloud shape that you are happy with rather than worrying about the whole decoration at once.
Keep your tension even when you begin. A cloud motif is usually at its best when it looks soft and rounded and not stiff. Too tight stitches can cause the cloud to lose its fluffy, airy look. If they are too wide, they may not hold their shape as well.
The first cloud is the sample piece you’re working with. When it is done, this can be your guide for the rest of the garland.
Step 2: Create the rounded cloud shape
The beauty of this project is the skeleton. A cloud is supposed to be puffy. Gentle. There are supposed to be soft bumps, not sharp corners. While working through the shape, keep checking the overall look and not just focusing on each individual stitch.
It helps to flatten the motif every now and then. That way you can see if the curves look balanced. Usually it does not matter much if one side is a little bit different than the other. Indeed, a hint of handmade variation can make the cloud taste even sweeter.
Don’t rush this. The roundness is what lends the motif the dreamy look and it is worth to take a little extra care here.
Step 3: Neatly Finish the Edges
Once you have the main cloud shape it makes a big difference to finish the edges neatly. A simple clean border or neat final round can help smooth out the outline and make the cloud look more polished. This will be especially useful in case you want to hang the garland in a place where the motifs will be visible from afar.
When you’re done, if the cloud looks a little lumpy, don’t worry. Small crochet motifs tend to look a lot better after the ends have been worked in and the shape tweaked gently by hand. You can smooth the bumps into place a bit, and help the cloud settle how you want it.
Step 4: Forming the Other Clouds
When the first cloud is ready, do likewise for the others. Here is where the project gets relaxing. Once you know the shape, you can easily get into a rhythm and make several clouds in one sitting.
Try to keep them fairly close in size so the garland looks balanced when it’s hanging. They don’t need to be exact but roughly the same ratios will make the finished strand look more polished. One easy way to do this is to compare each new cloud to the first one before you finish fastening off.
One-color clouds provide a soft, simple look, or mix a few pastel shades for a more playful style.
Step 5: Choose the Layout
Lay all the clouds out in a row before you join anything together. This helps determine how many you want, how much space should sit in between them and what the overall length should be.
A tighter arrangement creates a more ornamental and fuller garland. It feels lighter and more airy with wider spacing. Both can look beautiful so it really depends on where you want to hang it. A shorter strand could work for a cot wall, shelf or little window area. You may want more clouds and more length for a party backdrop or longer wall.
It’s also the best time to think about whether you want to add anything extra like stars, raindrops, moons or pom-poms in between the clouds. The garland is beautiful as is, but a few small additions can make it feel that much more personal.
Step 6: Tie Up the Garland (1)
Once the layout looks how you want it, attach the clouds to a piece of yarn, cord, or twine. Matching the yarn will give a soft finished look, while twine can give a slightly rustic handmade feel. If the project is for nursery or soft room decor many people like to use a simple yarn strand, as it blends in nicely with the crochet.
Ensure the clouds are hanging level and forward. Hold the strand up before you complete the fastening to check the spacing. Sometimes what looks perfect on a table feels a little different when hung up. A quick check here can save you from having to redo the assembly later.
Step 7: Add the finishing touches
When the clouds are attached, trim off any loose ends and check the balance overall. Now if one cloud looks slightly askew or a little too close to another, move it.
A gentle block can help if your motifs are curling a little. No need for anything fancy. Just shape them lightly, keep them flat and let them dry in place if needed. That little finishing touch can make the whole garland look neater.
The end result should have a soft, simple, dreamy feel to it. This is the kind of decoration that brings warmth without overdoing the space.
Helpful Hints
Make one cloud first, and use that as your sample for the rest.
Keep your tension so that the motifs look the same size.
And as you work, lay the cloud flat to see the shape.
Weave in the ends before assembling for a cleaner finish.
Before you glue everything down, make sure the spacing is right.
Opt for soft colours for a soothing nursery or bedroom look.
Common Errors to Avoid
Stitches pulled too tight to make the clouds look stiff
Rushing the round shaping and getting uneven bumps
making each cloud a really different size
Attaching motifs before checking the layout first
Using a hanging strand that is too stretchy
Omitting to lift the garland up before the last insertion
Tips for customisation
There are so many easy ways to make this garland feel like yours. Go for classic white clouds for a clean, dreamy style, or pick pale pink, blue, lavender or cream for a softer nursery palette. For a weather theme, add raindrops underneath; for a bedtime look, little stars; or a moon motif for a night-sky version. If you want a cute, child-friendly finish another sweet idea is to sew a tiny sleepy face onto each cloud.
Styling Ideas
A crochet cloud garland is a lovely addition to a cot, bookshelf, window or bedroom wall. It also makes a beautiful baby shower, birthday backdrop and cosy reading corner. A shorter one would be adorable on a small shelf, a longer strand could be a centrepiece in a nursery or playroom.
Care Instructions:
If the garland needs to be cleaned, gentle hand washing is generally the safest bet. Lay the clouds flat to dry and do not dry on high heat. If they lose their shape a little, gently smooth them while they’re damp, and let them dry flat before hanging them again.
Time Required
Depending on your speed, yarn, size and this may take a few hourshow many clouds you want in the finished garland.
Credit By:
https://www.youtube.com/watch?v=i00CBY0hfQM
Conclusion
A crochet cloud garland is such a soft and cheerful project to make when you want something decorative, calming, and handmade. It is simple enough to enjoy without stress, but once it is finished, it adds so much charm to a space. You can keep it plain and minimal or dress it up with extra details to match your own style. It is the kind of crochet project that feels peaceful to make and lovely to display.
FAQs
Is this beginner-friendly?
Yes, this is a nice project for beginners or confident beginners who are comfortable with basic crochet and small motif shaping.
What yarn works best for a cloud garland?
A soft smooth yarn works beautifully. Cotton gives a neater outline, while acrylic or baby yarn can give a softer look.
Can I adjust the size?
Yes. You can make the clouds larger or smaller by changing your yarn, hook, and overall tension, and you can adjust the garland length by adding more motifs.
Can I add other shapes with the clouds?
Yes. Stars, raindrops, moons, or pom-poms can pair very nicely with clouds if you want a fuller themed garland.
How do I make the garland look neater?
Keep the clouds close in size, test the spacing first, weave in your ends before assembly, and lightly block the motifs if needed.