
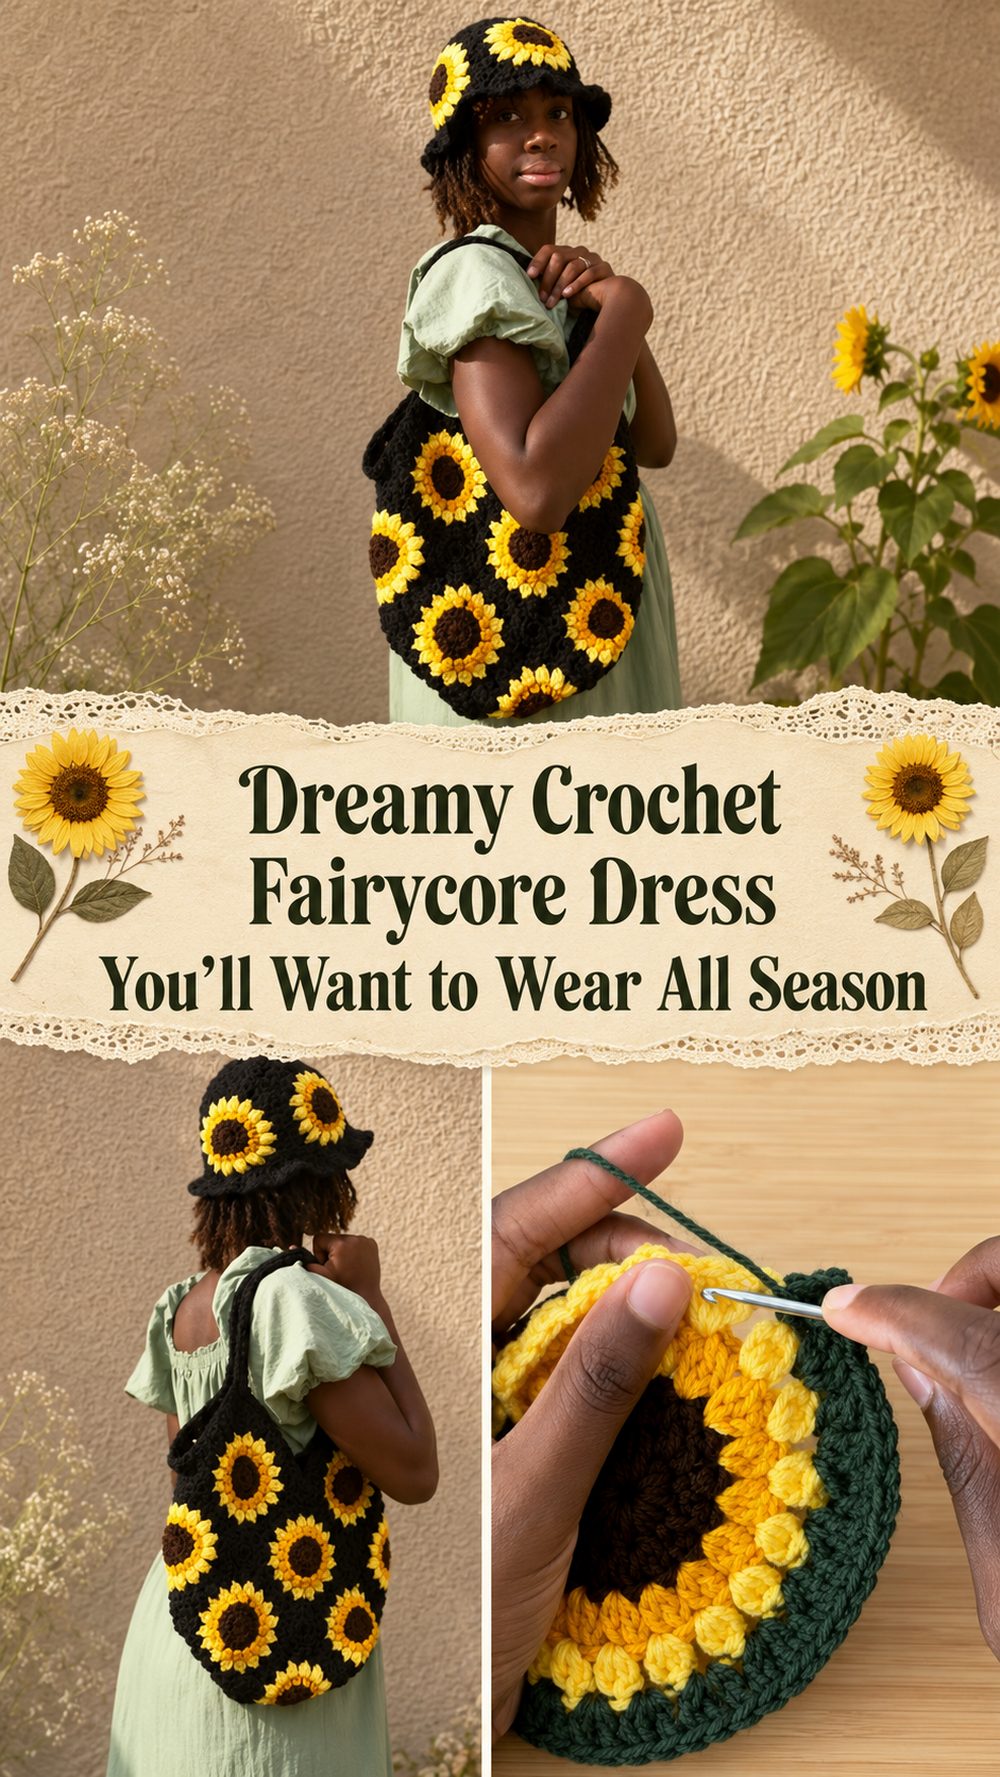
A crocheted flower bag is such a fun project when you want something cheerful and handmade and easy to wear. This iteration has a bright sunflower style and simple tote shape so it feels playful but still practical. This is a step-by-step sunflower tote bag tutorial.
Why You’ll Love This Project
This bag is a great combination of cute and useful. It has the charm of flower motifs with a form you can actually carry every day and it is a satisfying project for anyone who likes to make crochet pieces that you can wear.
Materials Required
- Thread
- Crochet hook Scissors Yarn needle
Choose a yarn and hook size that will work with your desired fit and texture.
Yarn for this project
For a bag like this, you want a smooth cotton or cotton blend yarn that will hold the shape nicely. For a softer look, you can use acrylic, but a sturdier yarn usually gives a better finish for everyday wear.
Skill Levels
Beginner to intermediate
Size & Fit Guide
You can make the bag larger by adding more flower style squares or by working the panels wider before joining. Adjust the strap length as needed and repeat until you reach the size you want.
Chain used for stitches
- Slip Stitch 4.
- dc – double crochet
- Petal stitches in a cluster style
How to make it start the Foundation
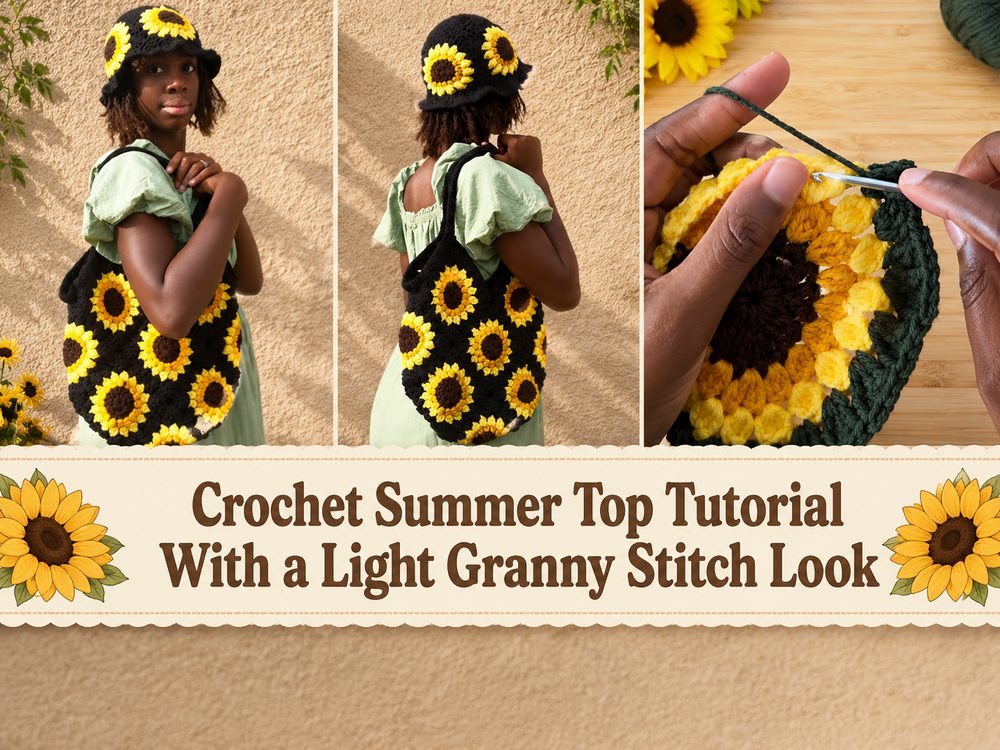
Create the flower motifs which would be the main look of the bag. The center is worked first, then the petals are built out from the center to form the sunflower-style design.
Work Main Section
Create enough face motifs for both sides of the bag. Keep your tension even so the pieces will match up nicely when sewn.
Join or Shapeways
Once your flower pieces are ready, sew them together to make the bag panels. Crochet around the joined sections to tidy the shape and create the body of the tote.
Add the Strap:
Once the bag body is together, work the handles. You can make them short for a hand bag, or longer for a shoulder tote.
Close the Edges
Weave in the ends and check all joins, then work a smart edging around the top. This makes the bag look cleaner and more finished.
Helpful Hints
- Use stitch markers to keep the joins straight.
- Join your motifs flat (not in the round).
- Make the two handles equal in length.
- Weave in ends securely as bags are used regularly.
- Flower shapes open nicely when light blocking.
Frequent Mistakes to Avoid
- Creating the motifs in different dimensions
- Pulling the join too tight
- Failing to measure handle length
- Structured bag with very stretchy yarn
- Skip the last edge cleanup
Ideas for customisation
You can adjust the flower colours to make them softer or brighter, add a button closure, make the strap longer, or add a fabric lining for extra structure. A contrast border can also make the flowers more prominent.
Style Ideas
This bag is cute with casual summer clothes, denim, simple dresses or market day looks. It’s also a sweet handmade gift for a floral accessories lover.
Care Instructions
Wash in cool water if needed, and reshape while damp, lay flat to dry. Don’t hang it wet so it will keep its shape.
Time Required
This can take anywhere from a few hours depending on your speed, yarn, size and stitch pattern.
Conclusion
If you love cheerful crochet projects, this is a lovely flower bag to try. It’s pretty, it’s functional, and it’s a fun way to transform simple stitches into something you can actually wear.
FAQs
Can beginners make this bag?
Yes, especially if you are already comfortable with basic stitches and joining pieces.
Can I use different flower colors?
Absolutely. This project looks great in bright, soft, or even neutral shades.
Can I make it bigger?
Yes. Add more motifs or continue until it fits the size you want.
Does it need a lining?
Not always, but a lining can help if you want more structure or plan to carry small items.
Can I make the strap longer?
Yes. Adjust the length as needed before finishing the bag.


