
A crochet lace collar is such a pretty little project when you want something delicate, classic and easy to style. This one has a lovely vintage feel and works beautifully as a removable accent over dresses, blouses and simple tops.
Why You Will Love this Project
This is a lovely project that is wearable and very satisfying to make. It has a dressy handmade look but is still practical enough to wear with everyday outfits for a sweet vintage touch.
What You’ll Need
- Yarn.
- Crochet hook.
- Scissors
- Needle for thread
- Close button
- If you like using one, a stitch marker
Choose the yarn and hook size to get the fit and texture you want.
Best Yarn for This Project
For a lace collar, a smooth, light-weight yarn is particularly good because it makes the pattern look crisp and neat. Soft cotton or a cotton blend is a nice option if you want the collar to hold its shape well.
Skill Level
Beginner to intermediate
Size & Fit Guide
This way of working is easy to adapt as you can keep working the collar until it sits where you want it around the neckline. You can also alter the width of the lace section to give you a softer everyday look or a more dramatic statement collar.
Stitches Employed
The crochet pattern has a lace style pattern with open spaces and shaping. Finished off with button loops for closure.
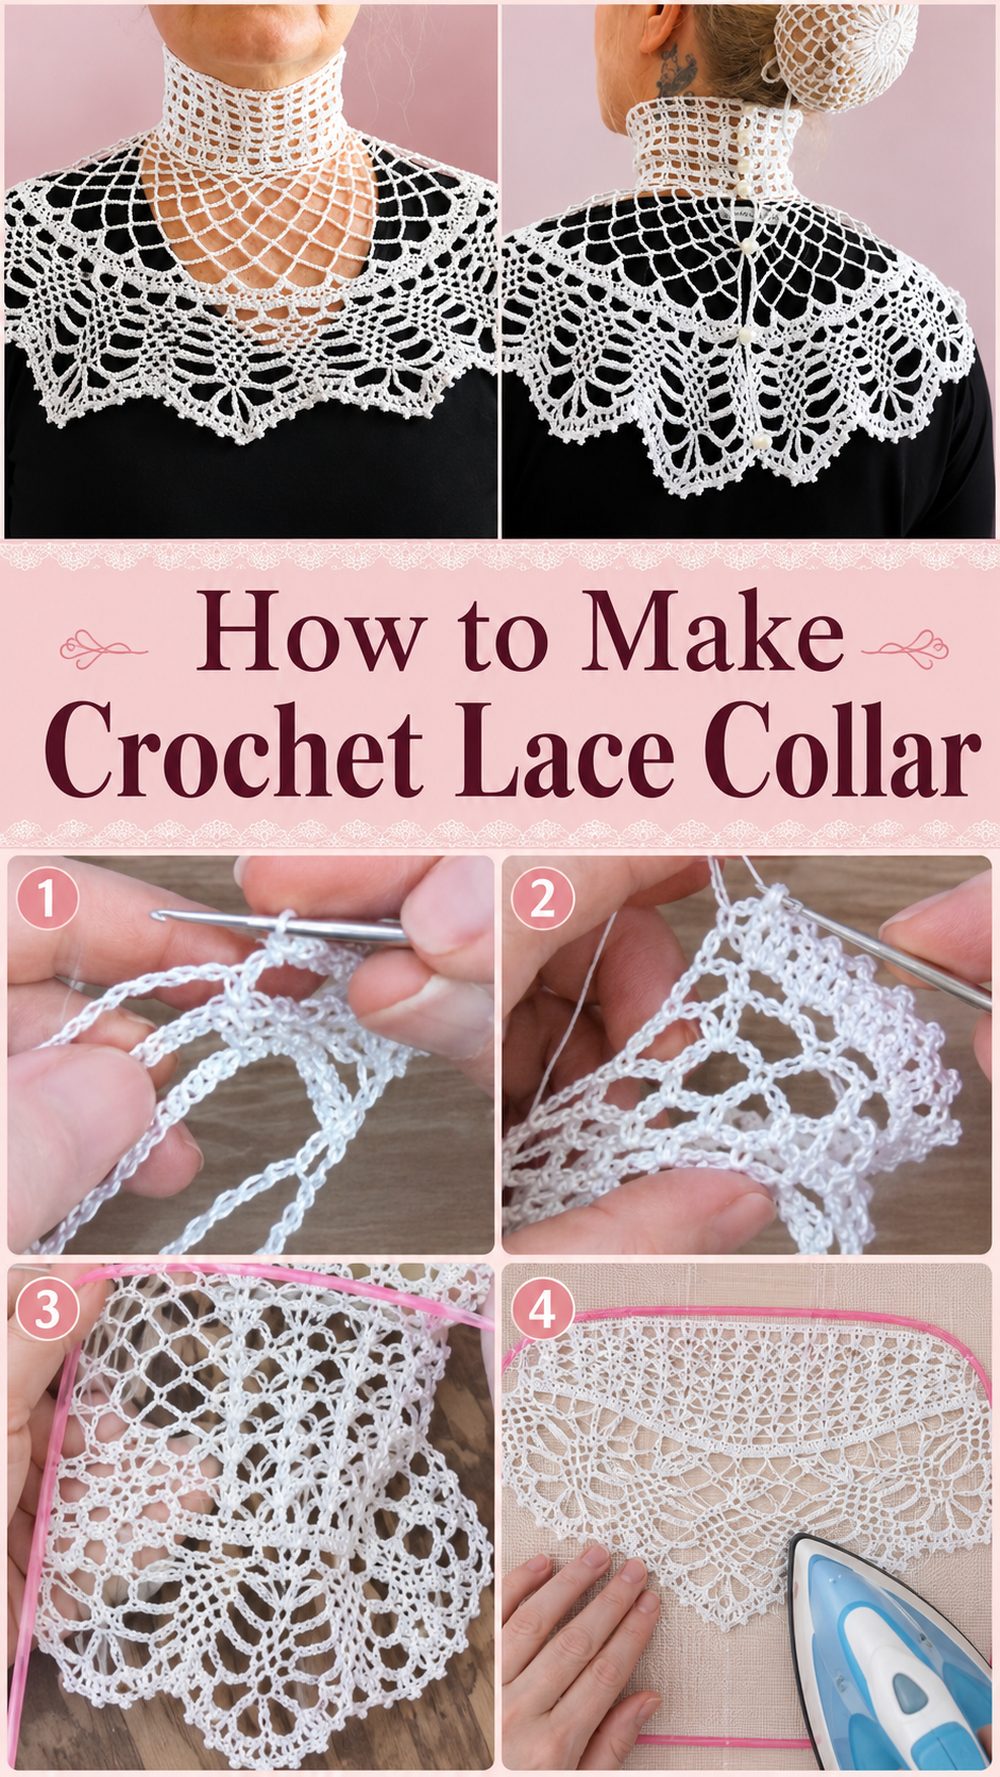
How To Make
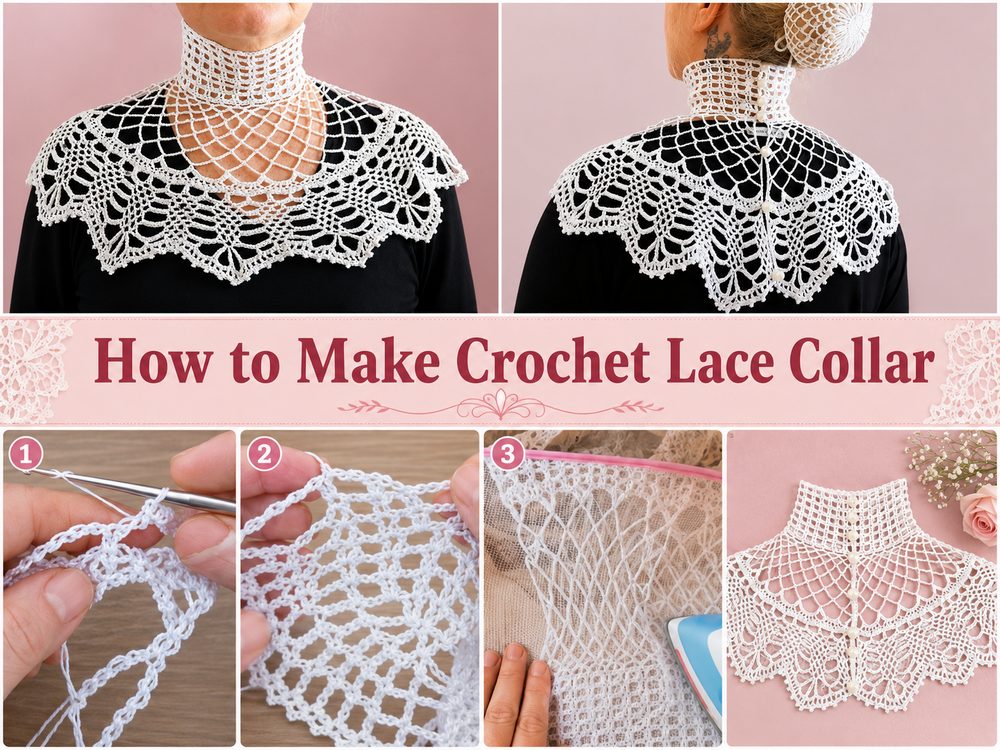
Begin the Foundation
Start by creating the top section that will sit around the neck. Keep your starting length comfortable so the collar can sit neatly without feeling too tight.
Work the Main Section
Work out the lace pattern in rows. As the collar grows out it starts to open and soften and get that nice decorative edge.
Change the Size
While at it, try it on your neckline. Repeat the pattern until you have the width and drape you want.
Join or Create
Keep shaping the ends so that the collar lays flat on either side. It also shows button loops which give the tutorial a pretty finished look and are easy to wear.
Edge treatment
Work the last edging neatly; weave in ends and sew on the button. It can help to block the lace so that it opens up beautifully.
Helpful Hints
- Check the fit around your neckline but the collar shouldn’t be too wide.
- Use markers to keep the two sides level.
- For a more finished lace look, try blocking at the end.
- Neatly weave in the ends so that the collar is tidy on the front and back.
Common Errors to Avoid
- Too tight a foundation
- Not checking the fit as you go
- Letting one side be longer than the other
- Bypassing the last shaping
- Do not block the lace if it appears curled.
Ideas for Customisation
You could make this collar in cream for a classic vintage look, or try black for something more dramatic. A pearl style button would look lovely. You could also add a slightly wider edging if you want a more decorative finish.
Style Tips
Dress up a simple outfit by wearing it over a plain dress, blouse or light-weight jumper. It’s also a great handmade gift for someone who loves feminine vintage inspired accessories.
Care Instruction
Hand wash in cool water, reshape when damp and dry flat. Store flat to keep the lace in shape.
Time Required
This can take anywhere from a few hours depending on your speed, yarn, size and stitch pattern.
Conclusion
This little lace collar is a sweet project that makes a big visual statement. ‘It’s the kind of piece that feels special to make, and even more special to wear.
Frequently Asked Questions
Can a beginner do this?
Yes, particularly if you are happy working a simple lace pattern step by step.
Do I need to get an exact size?
Nope. You can keep adjusting the collar until the neckline looks exactly the way you want.
What yarn is best for a lace collar?
Lightweight smooth yarn is usually best because it shows off the lace clearly.
Is a closure needed?
This tutorial uses button loops, so a button closure works well.
Should I block that?
Yes, blocking helps the lace to unfurl and makes the collar a more attractive finished form.


