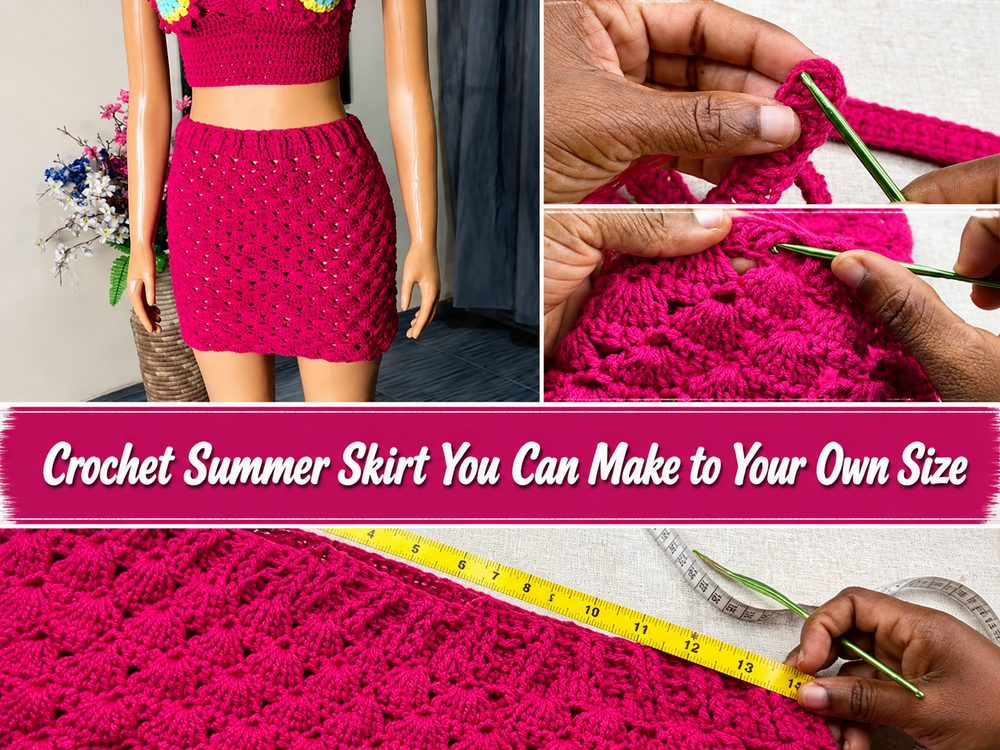
Easy Crochet Summer Skirt You Can Make to Your Own Size
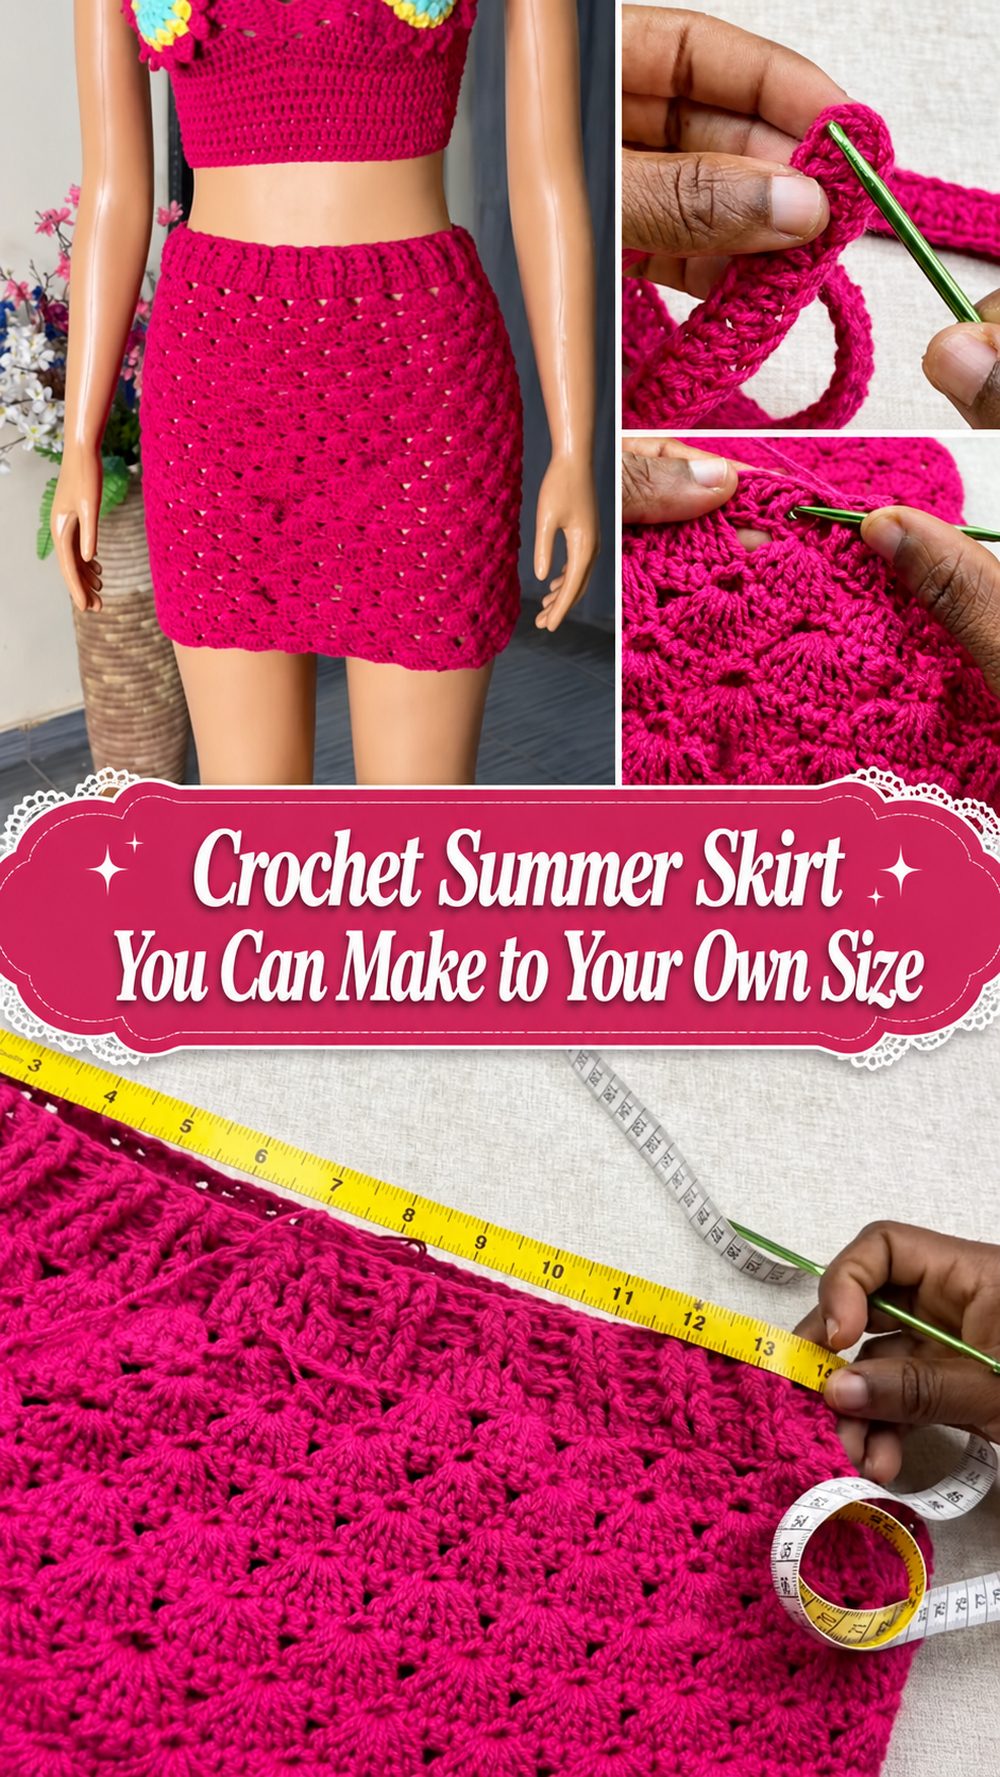
A crochet summer skirt is such a fun project when you want something handmade that actually feels wearable in everyday warm weather. It has that lovely mix of comfort and style, and it is one of those pieces you can dress up for vacation days, beach walks, casual afternoons, or layered summer outfits. The tutorial I chose for this one is a beginner-friendly summer skirt video that clearly walks through the materials, how to take your measurements, how to start the waistband, and how to build the skirt body, which makes it a great choice for a made-to-measure project rather than a fixed one-size design.
Why You’ll Love This Project
This skirt is a great summer make because it is wearable, customizable, and beginner-friendly. The selected tutorial is clearly organized around measurements, the waistband, and the main skirt body, so it feels practical instead of confusing, especially if you want to make a skirt that fits your own shape rather than guessing from a fixed pattern.
Materials Needed
- Yarn
- Crochet hook
- Scissors
- Yarn needle
- Stitch markers
- Measuring tape
- A comfortable top or slip to pair with it if you want extra coverage, depending on your yarn and stitch choice
Use a yarn and hook size that matches your desired fit and texture.
Best Yarn for This Project:
For a summer skirt, lightweight breathable yarn is the nicest option. Cotton, bamboo blends, or soft plant-fiber yarns work especially well because they help the skirt feel cooler, lighter, and more comfortable in warm weather. If you want a skirt that holds shape a little better, cotton is a very practical choice. If you want more softness and flow, a breathable blend can be lovely too. Since this project is meant for summer wear, it is best to avoid anything too bulky or overly warm.
Skill Level:
This project is beginner-friendly. The selected YouTube tutorial is labeled as an easy crochet summer skirt tutorial for beginners, and the visible structure of the lesson moves through materials, measurements, the waistband, and then the skirt body in a clear order.
Size and Fit Guide:
This skirt is especially nice because it starts with measuring, which means you can make it to your own size rather than trying to force a standard size to work. The tutorial specifically includes a section on how to take measurements before starting, so the project is meant to be adjusted to the wearer from the beginning. Keep checking the waistband and body as you crochet, and add or reduce rows or rounds as needed for your preferred fit and length.
Stitches Used:
The search result does not clearly list every stitch by name, so it is best to follow the tutorial directly for the exact stitch combination. What is clear is that the skirt is structured in sections, beginning with the waistband and moving into the skirt body, so the construction is straightforward and wearable rather than overly decorative or complicated.
How to Make It
Step 1: Take Your Measurements
This project begins the right way for a wearable summer skirt: with measurements. That already makes it feel more approachable, because you are not trying to guess how wide the waistband should be or how long the skirt needs to become. The selected tutorial clearly includes a section on how to take your measurements before the crochet really begins, which is one of the most useful parts of a made-to-measure garment project.
When measuring for a skirt, think about where you want it to sit on your body. Some people like a high-waist fit, while others prefer the skirt to sit closer to the hips. Also decide early whether you want a mini, above-the-knee, midi, or longer summer look. A few minutes of measuring now makes the rest of the project much easier, and it helps the final skirt feel more like something made just for you.
Step 2: Start the Waistband
After the measuring section, the tutorial moves into the waistband. That is a very smart way to build a skirt because the waistband helps establish the fit right away. According to the selected result, the lesson specifically includes a section called “Starting the waistband,” so the skirt is clearly built from the top down or from the waist area first.
The waistband is where you want to be a little extra careful. It should feel secure enough to stay in place, but not so tight that it becomes uncomfortable in summer weather. Keep your tension even and check the fit as you go. If you want a cleaner look, keep the waistband simple and smooth. If you want the skirt to feel more relaxed and beachy, allow a little ease so it sits comfortably without clinging too much.
Step 3: Build the Main Skirt Body
Once the waistband is established, the tutorial moves into crocheting the skirt body. The selected result clearly lists “Crocheting the skirt body” as the next major stage, which is exactly what you want in a clear wearable tutorial.
This is the part where the skirt really starts to become exciting, because the fabric begins to grow and you can finally see the drape and style taking shape. For a summer skirt, the nicest result usually comes from keeping the fabric breathable and comfortable. If the stitch pattern looks open or airy in the video, that is a great match for warm weather. If it looks a little denser, a light yarn can still keep it feeling summery enough.
As you build the body, stop every so often and hold the skirt against yourself or compare it to a skirt you already like wearing. That helps you decide whether you want it more fitted, more relaxed, or slightly flared. A handmade summer skirt looks best when it feels easy to wear, so comfort matters just as much as the final look.
Step 4: Keep the Shape Balanced
One of the most important parts of crocheting a garment is checking the shape as you go instead of waiting until the very end. With a skirt, this means watching the width, the straightness of the sides, and the way the fabric hangs. If your tension changes partway through, the skirt may start to pull in or widen more than you planned.
This is also the point where you can decide how airy you want the finished piece to feel. A summer skirt does not need to be stiff or heavy. In fact, it usually looks best when it has a little movement. If your stitches are getting too tight, loosen your hands slightly so the skirt keeps a softer drape. If it is becoming too loose, slow down and make sure your edges stay tidy.
Step 5: Adjust the Length
A big advantage of a made-to-measure skirt is that you do not need to stop at an exact printed row count unless you want to. You can simply continue crocheting until the length feels right for you. The tutorial already begins from personal measurements, so it makes sense to keep using that same approach through the length of the project.
If you want a playful beachy style, keep it shorter. If you want something that feels more wearable for everyday outfits, add more length. You can also think about what you plan to wear underneath or alongside it. A lighter summer skirt can be great over swimwear, but it can also look lovely layered over a slip or paired with a simple fitted top.
Step 6: Finish the Skirt Neatly
Once the skirt reaches your preferred length, finish the last section neatly and weave in all the ends carefully. Garments always look more polished when the finishing is tidy, and this matters even more for something as visible as a skirt waistband and hem.
Before calling it done, try it on or hold it up one more time and check that the waistband feels comfortable, the body hangs evenly, and the hem looks balanced. A crochet skirt does not need to be perfect to look beautiful, but a few small finishing checks can make it feel much more polished and wearable.
Helpful Tips
- Use a breathable yarn for a more comfortable warm-weather skirt.
- Measure carefully before starting the waistband.
- Check the fit often while building the body.
- Keep your tension even so the skirt hangs nicely.
- Try the skirt against your body as you work if possible.
- Weave in ends neatly for a cleaner finished garment.
Common Mistakes to Avoid
- Skipping measurements and hoping the fit will work out later.
- Making the waistband too tight or too loose.
- Using yarn that feels too heavy for summer wear.
- Forgetting to check the drape of the skirt body as it grows.
- Letting the edges become uneven from inconsistent tension.
- Finishing the length without trying to judge how it will actually sit when worn.
Customization Ideas
A crochet summer skirt is very easy to personalize. You can keep it simple in one neutral shade for a clean beachy look, or use bright summer colors for something more playful. You could make it shorter for a light vacation outfit or longer for a more relaxed boho feel. A neat fitted waistband with a breezier body also creates a lovely balance. If the stitch pattern allows, you can keep the texture airy for hot days or use a slightly denser section around the upper part for more coverage.
Style Ideas
This kind of skirt looks lovely with a fitted tank, bikini top, cropped tee, or simple blouse. It works well for beach layering, holiday outfits, casual summer days, or even festival styling depending on the yarn and length. You can keep it minimal with sandals and a tote, or dress it up a little with jewelry and a lightweight cover-up.
Care Instructions
Hand wash gently or use a delicate cycle if your yarn allows it. Lay the skirt flat to dry so it keeps its shape, especially around the waistband. Avoid high heat, because summer fibers and handmade garments usually last better when dried gently and reshaped while damp.
Time Needed
This may take a few hours to a couple of days depending on your speed, yarn choice, skirt length, and stitch pattern.
Conclusion
A crochet summer skirt is such a satisfying project because it gives you something stylish, handmade, and actually useful for warm weather. This tutorial stands out because it clearly walks through the materials, measurements, waistband, and skirt body, which makes it feel friendly for beginners and practical for anyone who wants a wearable result.
FAQs
Is this beginner-friendly?
Yes. The selected YouTube tutorial is specifically presented as an easy crochet summer skirt tutorial for beginners.
Can I adjust the size?
Yes. The tutorial includes a section on how to take measurements, so the skirt is meant to be adjusted to fit the wearer.
Is this good for summer?
Yes. It is specifically framed as a summer skirt tutorial, and the project is meant for warm-weather wear.
What yarn is best for this kind of skirt?
Lightweight cotton or another breathable yarn is usually the best choice for comfort and summer wear.
Can I make it longer or shorter?
Yes. Since it is measurement-based, you can continue the body until it reaches the length you want.