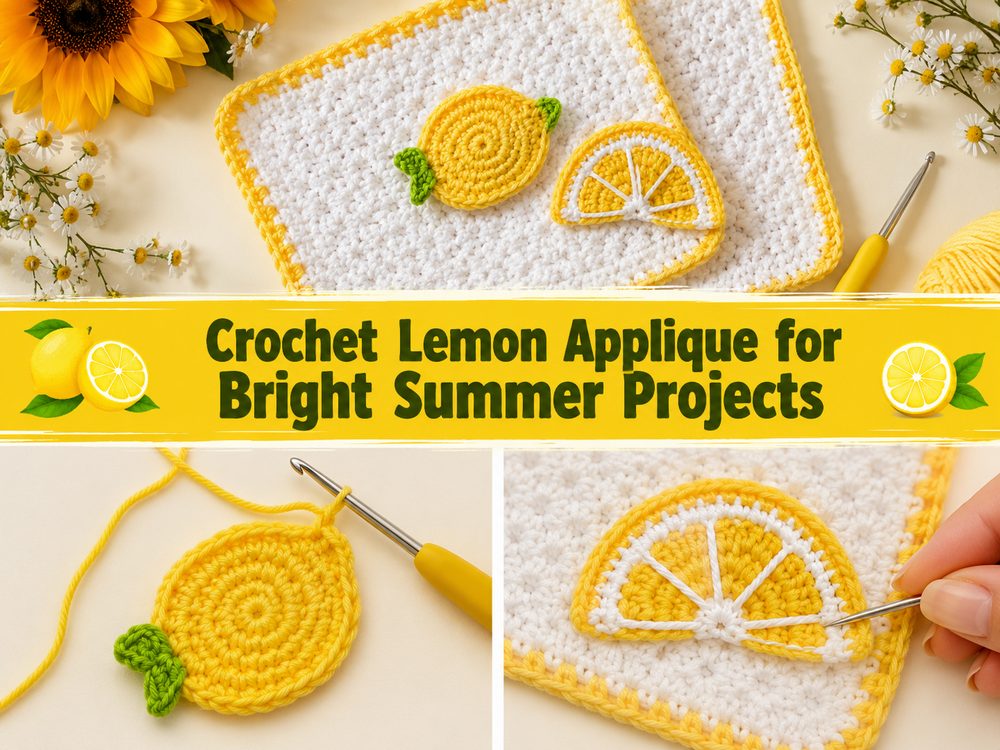
Crochet Lemon Applique for Bright Summer Projects
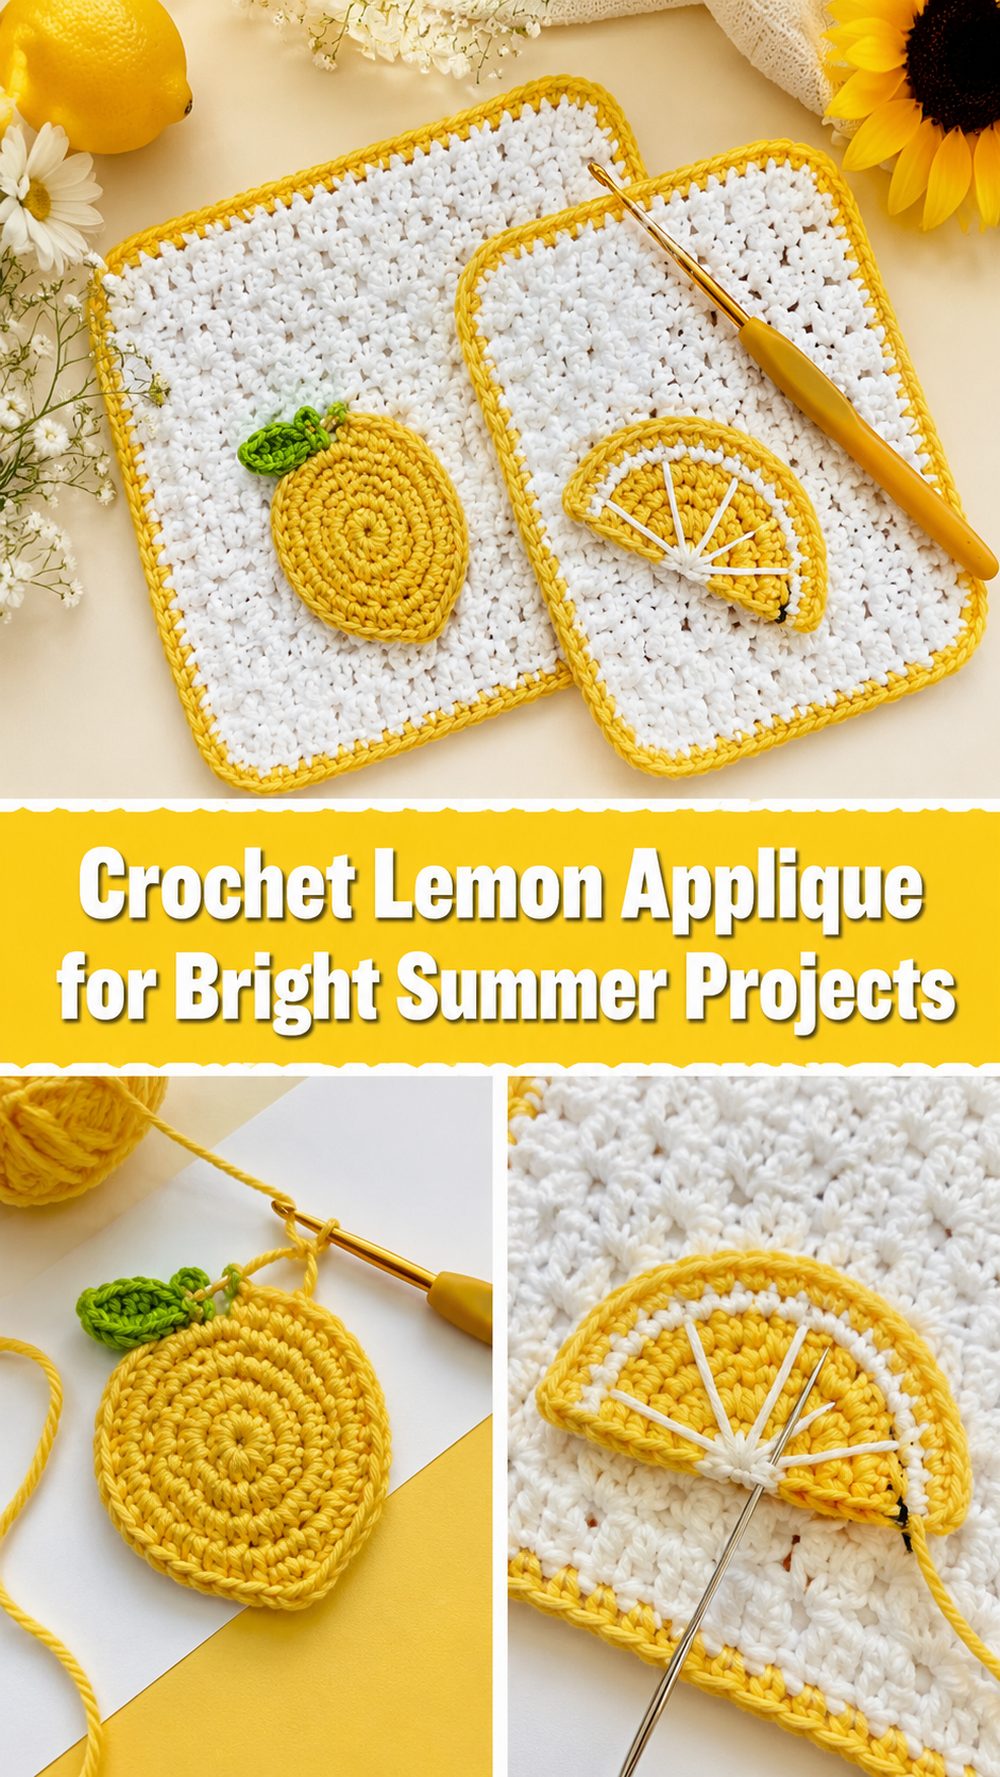
A crochet lemon applique is one of those tiny projects that can instantly make something feel fresh, cheerful, and handmade. It is quick, cute, and perfect for adding a playful citrus touch to all kinds of crochet or sewing projects. You can stitch one onto a tote bag, a sun hat, a baby item, a kitchen towel topper, or even use it as part of a fruit-themed garland. This kind of project is especially fun when you want something light and satisfying that does not take much yarn. It also works well for using up scraps in yellow, green, and a little white if you want extra detail. If you enjoy simple crochet with charming results, this lemon applique is a lovely little make that feels creative without being overwhelming.
Why You’ll Love This Project
This project is fun because it gives you a finished result very quickly, but it still looks detailed and adorable. A lemon applique adds color, personality, and a handmade touch to almost anything, and it is small enough to make in an afternoon without feeling like a big commitment.
Materials Needed
- Yellow yarn for the lemon body
- Green yarn for a leaf if you want that extra detail
- Crochet hook
- Scissors
- Yarn needle
- Stitch marker
- Measuring tape if you want to match a specific project size
Use a yarn and hook size that matches your desired fit and texture.
Best Yarn for This Project:
A smooth yarn that shows stitches clearly is a great choice for this applique. For a fresh summer look, cotton or a cotton blend works especially well because it gives the lemon a clean shape and a neat finish. If you want the applique to feel soft and flexible, a light acrylic can also work nicely. Since this is a decorative piece, the best yarn is one that holds its shape without becoming too stiff.
Skill Level:
This is beginner-friendly to easy.
It suits crocheters who are comfortable making a starting ring or foundation, working basic stitches, and shaping a small motif. Even if you are still learning, this is a nice little project for practicing even tension and simple increases.
Size and Fit Guide:
Because this is an applique, the size is easy to adjust. You can make it smaller by stopping earlier, or make it larger by continuing the shaping rounds a bit longer. If you are attaching it to clothing, bags, towels, or home decor, place it on the item before finishing off so you can check whether the size looks balanced.
Stitches Used:
- Chain
- Slip stitch
- Single crochet
- Increases
- Simple shaping stitches
How to Make It
Step 1: Start the Foundation
The lemon begins as a small center section, usually worked in yellow. This kind of applique is built from a compact starting point and then shaped outward, so your first few stitches matter most for keeping the piece neat. If you use a stitch marker early on, it will be much easier to follow the shape and keep the edges clean.
Take your time with the first round or opening section. A firm but not tight start helps the lemon keep its shape later. Since this is a flat applique, you want the work to stay smooth instead of curling too much.
Step 2: Build the Lemon Shape
Once the center is made, the body grows through simple rounds or shaped rows. The goal here is to create that soft lemon look rather than a perfect circle. As the piece gets bigger, the shaping gives it a slightly stretched form, so it feels more like a whole lemon instead of a generic round fruit.
Keep your stitches even and lay the piece flat every so often. If it starts to ripple, your increases may be too many. If it curls inward, you may need a little more room in the shaping. Small applique projects are very forgiving, so it helps to just pause and look at the overall outline as you go.
This part is where the lemon starts to come to life. You will notice the body becoming fuller through the middle, with a more natural finish at the ends. That gentle shaping is what makes the final applique look decorative and realistic without being complicated.
Step 3: Refine the Outline
After the main lemon body is made, the edges are often cleaned up with a simple finishing pass. This helps smooth the shape and makes the outline look tidy, especially if the applique will be sewn onto another project. A neat edge can also make the lemon stand out more clearly when placed on fabric, crochet garments, or accessories.
If your piece has one end that looks slightly wider or less defined, you can lightly shape it with your final stitches and when you weave in the ends. That is one nice thing about appliques: a tiny adjustment can improve the whole look.
Step 4: Add the Leaf or Top Detail
A lemon applique looks lovely on its own, but a small green leaf adds a lot of charm. This detail can be worked separately and attached after, or added directly near the top depending on the method used. Keep it small and simple so it complements the lemon instead of taking over the design.
The leaf gives the applique a brighter, more finished look, especially if you want to use it on summer projects, kitchen decor, picnic themes, or fruit-inspired baby items. You can make one leaf for a clean look or try two tiny leaves if you want a fuller accent.
Step 5: Check the Size and Balance
Before fastening off completely, place the lemon applique on the item where you plan to use it. This helps you see if the scale feels right. A small lemon is perfect for hats, pockets, or bookmarks, while a larger one works nicely on bags, cushion covers, market totes, and wall hangings.
If you want a longer lemon, continue the body shaping just a little more before finishing. If you want a rounder, cuter version, stop earlier. This project is easy to personalize because the shape does not need to be exact to look lovely.
Step 6: Finish and Attach
Once the stitching is complete, fasten off and weave in the ends neatly on the back. If the applique needs a cleaner finish, you can gently shape it with your hands or block it lightly. Then sew it onto your chosen project with a yarn needle using matching thread or yarn.
Try attaching it to:
- tote bags
- summer tops
- children’s clothing
- tea towels
- aprons
- table runners
- gift wrap embellishments
- crochet fruit garlands
The finished lemon should look bright, neat, and slightly shaped, with a cheerful handmade feel. It is the kind of little motif that can make a simple project feel much more playful.
Helpful Tips
- Use cotton yarn if you want a crisp, fresh summer look.
- Keep your tension even so the applique lies flat.
- Use a stitch marker in the beginning to track the shape more easily.
- Check the outline often instead of waiting until the end.
- Add the leaf after the lemon body is done so you can place it where it looks best.
- Block lightly if the edges need smoothing.
Common Mistakes to Avoid
- Making the starting stitches too tight, which can distort the shape
- Adding too many increases and ending up with a ruffled lemon
- Forgetting to check that the applique lies flat while working
- Making the leaf too large for the lemon body
- Sewing it onto a project before weaving in the ends properly
- Using very fuzzy yarn if you want the stitch shape to show clearly
Customization Ideas
You can make this applique feel more personal in so many easy ways. Try a brighter yellow for a playful cartoon look or a softer pastel yellow for a gentle spring style. Add a white accent if you want a sliced-citrus feel, or keep it simple for a whole lemon look. You could also add a tiny embroidered line for extra definition, make matching fruit appliques, or turn the lemon into part of a larger market or garden theme.
Style Ideas
This little lemon looks lovely on summer accessories and home decor. Stitch it onto a tote bag for a fresh seasonal touch, add it to a child’s sun hat, or use a few of them on a garland for a cheerful kitchen display. It also makes a sweet handmade extra on gift bags, baby blankets, and picnic-themed projects.
Care Instructions
If attached to a washable item, gentle care is best. Hand washing or a delicate wash helps the applique keep its shape. Lay flat to dry and avoid high heat, especially if your yarn is soft or lightweight. If needed, reshape it gently while damp.
Time Needed
This may take a few hours depending on your speed, yarn, size, and stitch pattern.
Conclusion
A crochet lemon applique is a small project, but it brings so much brightness and personality to your handmade pieces. It is easy to enjoy, simple to customize, and perfect for using scraps in a creative way. You can keep it tiny and sweet or make it a little larger for a bolder look. Play with color, shape, and placement, and make it suit your own style.
FAQs
Is this beginner-friendly?
Yes, it is a good project for beginners who know basic crochet stitches and want to practice small shaping.
What yarn is best for a lemon applique?
Cotton or a smooth cotton blend is a great choice because it holds the shape nicely and gives a clean finish.
Can I adjust the size?
Yes. You can make it smaller or larger by stopping earlier or continuing the shaping a little longer.
Can I use this on clothing or bags?
Yes, this applique works well on bags, tops, hats, aprons, and many decorative projects.
How do I make it look neater?
Keep your tension even, weave in ends carefully, and lightly block the finished applique if needed.