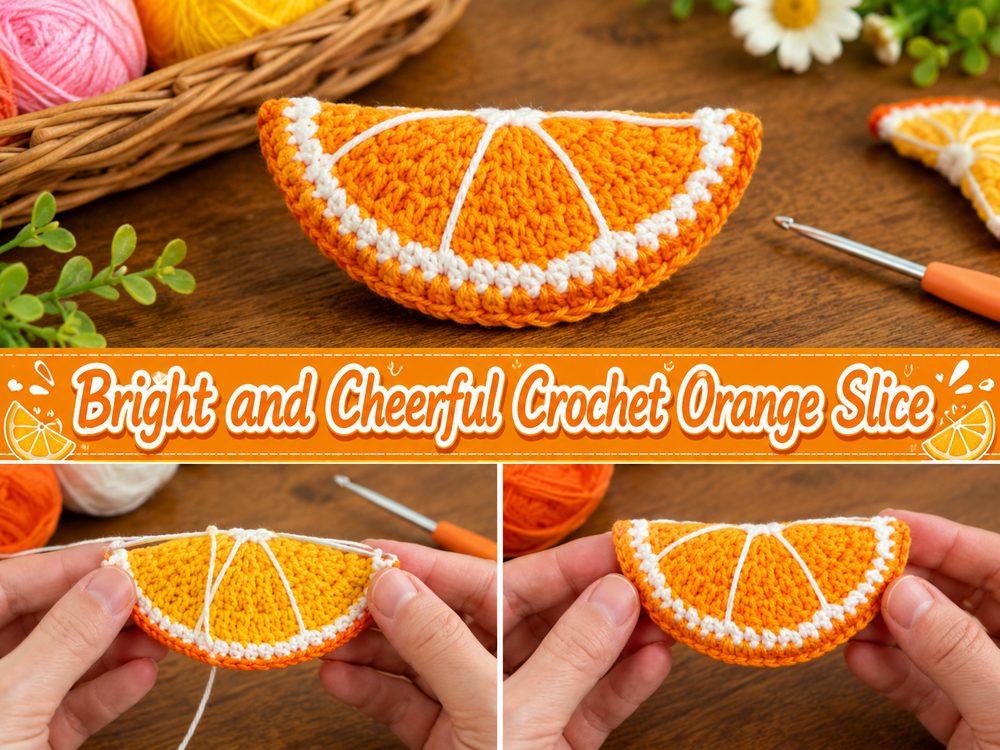
Bright and Cheerful Crochet Orange Slice
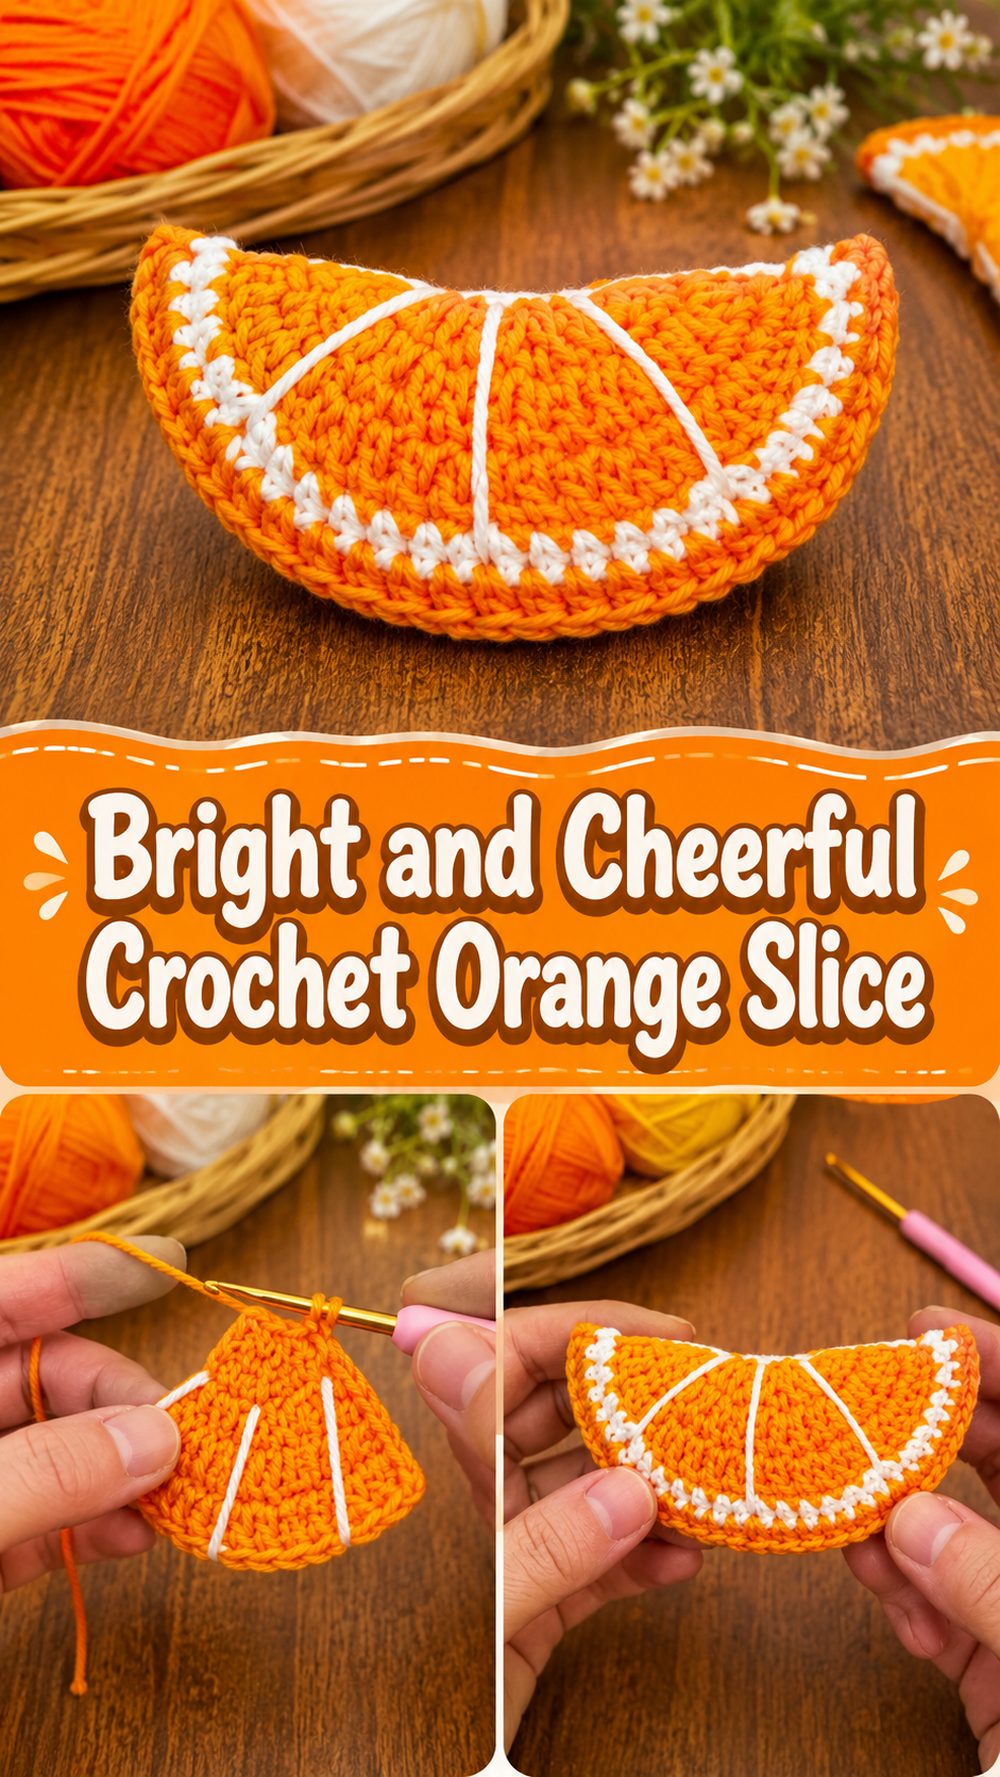
A crochet orange slice is the kind of little project that feels instantly happy. It is colorful, playful, and perfect for adding a handmade citrus touch to your space or your accessories. You can use it as a coaster, an applique, a small decorative patch, or even turn it into part of a fruit-themed garland. What makes this project especially fun is that it gives you that fresh orange look with simple shaping and color changes, so it feels creative without being too difficult. It is also a lovely scrap-yarn project when you want to make something cute without starting a big piece. If you enjoy quick crochet projects that still look eye-catching and detailed, this orange slice is a really satisfying one to try. The tutorial I selected is presented as a step-by-step beginner project on YouTube.
Why You’ll Love This Project
This project is fun because it is small, colorful, and very satisfying to watch come together. The sections of the orange give it a detailed look, but the overall design is still simple enough to enjoy as a relaxing make. It is also useful because you can use it in different ways, from decor to gifts to practical little coasters.
Materials Needed
- Orange yarn
- White or cream yarn for the inner citrus details
- Crochet hook
- Scissors
- Yarn needle
- Stitch marker
- Measuring tape if you want to match a specific finished size
Use a yarn and hook size that matches your desired fit and texture.
Best Yarn for This Project:
A smooth cotton yarn is a lovely choice for an orange slice, especially if you want it to hold its round shape well and show off the stitch definition clearly. Cotton also works beautifully if you plan to use it as a coaster or table decoration because it feels crisp and practical. If you want a softer decorative finish, a cotton blend or soft acrylic can also work, but a yarn with clear stitch definition will help the orange segments stand out nicely.
Skill Level:
This is beginner-friendly to easy.
It is a good project for someone who already knows how to make basic stitches and is ready to practice working in the round, shaping, and changing colors neatly. The design looks impressive, but it is built from simple steps.
Size and Fit Guide:
Since this is a flat motif, the size is flexible. You can make it smaller for appliques, patches, or bunting, or make it larger for coasters or playful home decor. Check the size as you go by placing it against the item you want to decorate, or by comparing it to your cup, bowl, bag, or other finished project.
Stitches Used:
- Chain
- Slip stitch
- Single crochet
- Double crochet
- Working in the round
- Color changes
- Simple shaping
How to Make It
Step 1: Start the Center
The orange slice begins in the middle. This center section creates the base for the whole fruit, so it is important to keep it neat and even. Usually this kind of project starts with a small ring or circle, then the first round is worked into that center to form a tidy foundation.
At this stage, keep your stitches snug but not too tight. If the center is pulled too hard, the orange can start to cup instead of lying flat. A stitch marker is helpful here, especially if you like keeping track of your rounds clearly.
Step 2: Build the Inner Orange Area
Once the center is made, the inner fruit area starts to grow outward. This is the part that gives the slice its bright juicy look. As you continue around, the piece becomes a flat circle, and this is where even tension really matters.
Lay your work down every so often and make sure it stays flat. If the circle begins to ripple, you may be adding too much width. If it curls inward, your stitches may be a little too tight. Small adjustments early on can make the rest of the project much smoother.
Step 3: Create the Citrus Segments
This is the part that gives the orange slice its personality. The segment lines are what turn a simple round crochet piece into something that actually looks like citrus. In the tutorial, the orange slice is shown with those clear inner sections that make it resemble a real fruit slice rather than a plain circle.
These details are usually made with a contrasting color, often white or cream, to separate the segments and create that familiar orange-slice appearance. Work carefully here and do not rush the placement. Even simple lines or section shapes make a big difference in the finished look.
If your segment details feel slightly uneven at first, do not worry. Once the whole piece is complete and the ends are woven in, the design usually looks much more polished.
Step 4: Add the Outer Rind
After the fruity center is finished, the outer rind gives the slice its final structure. This border helps frame the piece and makes the orange stand out beautifully. It also adds that realistic citrus feel, because the contrast between the center and the edge is what makes fruit-slice motifs so recognizable.
For this step, try to keep your stitches consistent all the way around so the edge stays smooth. A slightly firmer border can help the piece hold its shape, especially if you want to use it as a coaster or applique.
Step 5: Check the Shape
Before fastening off, lay the orange slice flat and look at the overall roundness. The center, segments, and rind should all feel balanced together. This is the best time to adjust anything small, like a slightly uneven edge or a loose segment line.
If you want a larger orange slice, use thicker yarn or continue with a broader outer round. If you want a tiny applique version, use lighter yarn and a smaller hook. The basic look stays charming across different sizes, which makes this pattern style very easy to adapt.
Step 6: Finish and Weave In Ends
Once everything looks neat, fasten off and weave in the ends on the back. Try to keep the back tidy, especially if the orange slice will be used as an applique on clothing, accessories, or gifts. If it will be used as a coaster or decoration on display, a clean finish still helps it look more professional.
If the piece looks a little wavy after finishing, gentle blocking can help smooth it out. Just shape it into a neat circle and let it dry flat. This often helps the citrus sections look cleaner too.
Step 7: Use Your Orange Slice
One of the nicest things about this project is how flexible it is. You can use the finished piece in many ways:
- As a cheerful coaster
- As an applique on a tote bag
- On a summer hat or top
- As part of a fruit garland
- On kitchen decor
- As a cute handmade gift topper
- On a child’s play set or pretend kitchen item
The finished orange slice should look bright, round, and playful, with clear segment details and a clean outer edge.
Helpful Tips
- Use cotton yarn if you want the orange slice to hold its shape nicely.
- Keep your tension even so the piece stays flat.
- Pause after each round to check the circle.
- Use a stitch marker if you tend to lose the start of the round.
- Weave in the ends carefully so the back stays neat.
- Light blocking can really improve the finished shape.
Common Mistakes to Avoid
- Pulling the center too tight and causing the piece to cup
- Making uneven stitches that distort the circle
- Rushing the segment details and placing them unevenly
- Using fuzzy yarn that hides the citrus look
- Forgetting to check whether the piece lies flat as you work
- Making the outer border too loose compared with the middle
Customization Ideas
You can have a lot of fun with this project. Make it bright and bold with classic orange and white, or go softer with pastel citrus colors for a playful nursery or spring theme. Add a hanging loop to turn it into an ornament. Stitch several together for a fruit banner. You could even make matching lemon, lime, and grapefruit slices for a whole citrus set.
Style Ideas
A crochet orange slice looks adorable in summer decor. Use it on picnic-themed table settings, attach it to market bags, or add it to kitchen towels and aprons for a fresh seasonal touch. It also makes a sweet little handmade extra for gift wrapping or craft fair items.
Care Instructions
If you use the orange slice as decor or an applique, gentle hand washing is usually the safest option. Lay it flat to dry and avoid high heat. If it loses shape after washing, reshape it while damp and let it dry flat.
Time Needed
This may take a few hours depending on your speed, yarn, size, and stitch pattern.
Conclusion
A crochet orange slice is such a cheerful little make. It is quick, creative, and easy to adapt for all kinds of uses. Whether you turn it into a coaster, applique, or decorative accent, it adds a bright handmade charm that feels perfect for warm-weather crochet. You can keep it simple, play with color, or make a whole basket of fruit-inspired pieces. It is a lovely project to enjoy when you want something small, cute, and satisfying.
FAQs
Is this beginner-friendly?
Yes, it is a nice beginner-friendly project for someone who is comfortable with basic stitches and wants to practice crochet in the round.
What yarn works best?
Cotton yarn is one of the best choices because it gives a clean shape and good stitch definition.
Can I adjust the size?
Yes. You can change the size by using a different yarn weight, hook size, or by slightly expanding the outer rounds.
Can I use it as a coaster?
Yes, this design works very nicely as a coaster, especially when made with cotton yarn.
How do I make it look neater?
Keep your stitches even, place the segment details carefully, weave in your ends neatly, and block it lightly if needed.