
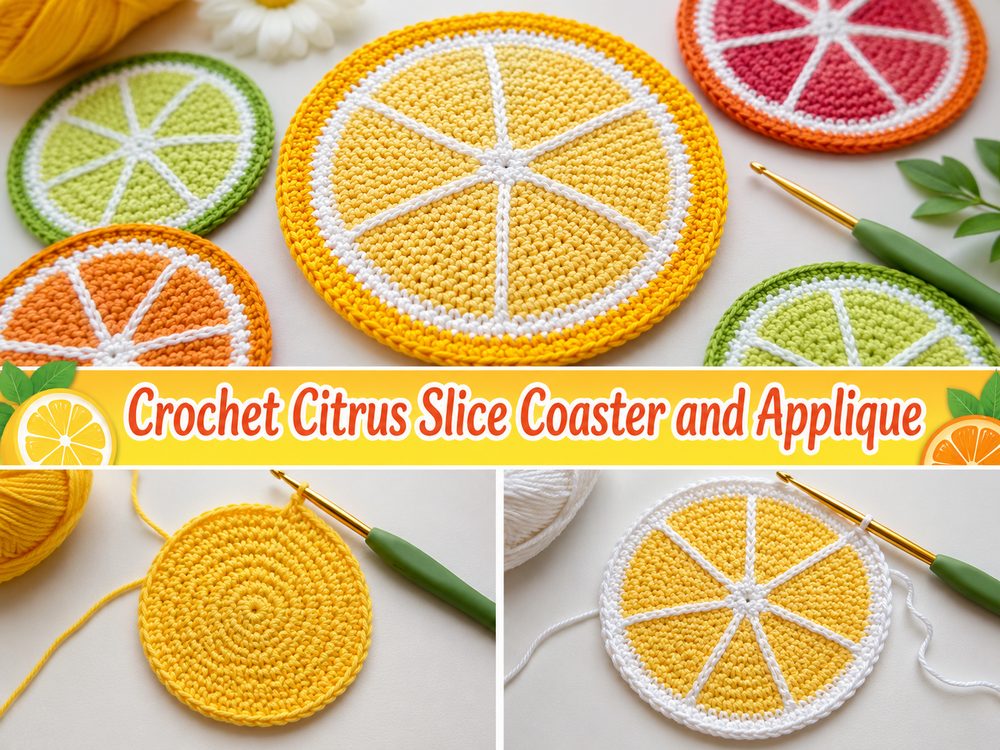
Crochet Citrus Slice Coaster and Applique
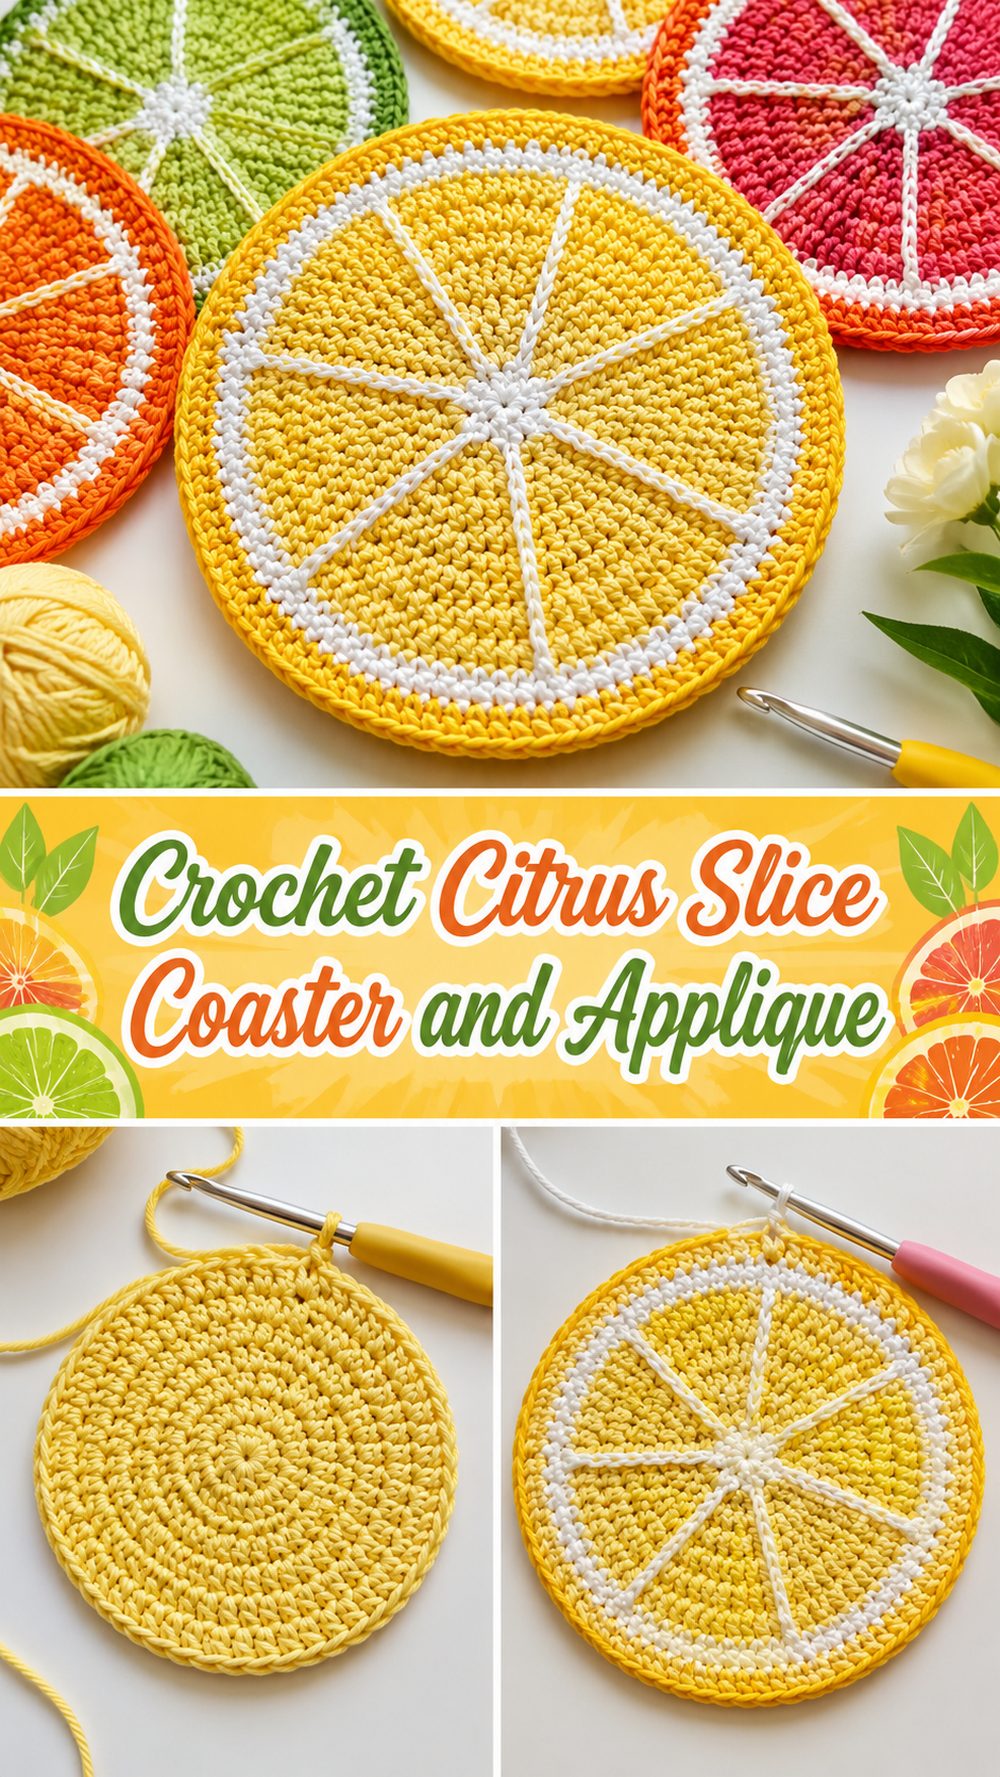
A crochet citrus slice is such a fun little project to make when you want something bright, fresh, and cheerful on your hook. It has that sunny handmade look that works beautifully in spring and summer, but it is also cute enough to use all year in a kitchen, craft room, picnic setup, or gift basket. What makes this kind of project especially appealing is how flexible it is. You can turn it into a coaster, a playful applique, a garland piece, or a small decorative patch for bags and pouches. It is also a nice scrap-yarn project because you only need a few colors to create that classic citrus look. The tutorial I selected is a beginner-friendly YouTube lesson for a no-sew citrus coaster that can be made in lemon, lime, orange, or grapefruit colors.
Why You’ll Love This Project
This project is small, colorful, and very satisfying to finish. It gives you that eye-catching fruit-slice look without needing a huge time commitment, and it can be made in several citrus shades by simply changing colors. The selected tutorial is described as an easy step-by-step beginner project for a citrus coaster in lemon, lime, orange, or grapefruit tones.
Materials Needed
- Main fruit color yarn in your chosen citrus shade
- White yarn for the inner divider lines and pith effect
- A crochet hook
- Scissors
- Yarn needle
- Stitch marker
- Measuring tape if you want to match a certain finished size
Use a yarn and hook size that matches your desired fit and texture.
Best Yarn for This Project:
Cotton yarn is a lovely choice for a crochet citrus slice, especially if you want to use it as a coaster. Cotton helps the piece lie flatter, shows the stitch definition nicely, and gives the fruit sections a crisp look. If you want a softer decorative version, a cotton blend also works well. Smooth yarn is usually best here because the citrus details show up more clearly than they would in fuzzy yarn.
Skill Level:
This is beginner-friendly to easy.
It suits crocheters who know basic stitches and want to practice working in the round, shaping a flat circle, and handling simple color changes. Since the tutorial is presented as beginner-friendly and no-sew, it should feel approachable for newer crocheters.
Size and Fit Guide:
Because this is a flat citrus slice, the size is easy to adjust. You can make a smaller one for an applique or keychain-style decoration, or make it larger for a coaster or a playful table accent. Check the size while you work by placing it under a mug, on a bag, or against the item you want to decorate.
Stitches Used:
- Chain
- Slip stitch
- Single crochet
- Double crochet
- Working in the round
- Color changes
- Simple shaping for the slice sections
How to Make It
Step 1: Start the Center
The citrus slice begins in the middle, just like many flat round crochet motifs. You start by creating a compact center that will support the rest of the slice. This middle area becomes the heart of the fruit, so it helps to keep your first stitches neat and evenly spaced.
Try not to make the opening too tight. If the center is pulled too hard, the slice may start to cup upward instead of resting flat. A smooth center makes the rest of the rounds much easier to build.
Step 2: Build the Fruit Interior
Once the center is complete, the fruit area grows outward in your main citrus color. This is where the slice starts to look bright and juicy. Keep your tension steady and pause once in a while to lay the piece flat on the table.
If the circle begins to curl, the stitches may be too tight. If it starts to ripple, there may be too much expansion. A citrus slice looks best when the body stays smooth and flat, especially if you want to use it as a coaster.
Step 3: Add the Segment Look
This is the part that really makes the project special. A citrus slice needs those inner dividing lines to look like real fruit. In the selected tutorial, the project is described as a citrus coaster that can be made in different fruit colors, so the segment effect is part of what gives it that adaptable lemon, lime, orange, or grapefruit look.
Work these details carefully and keep them evenly placed around the circle. The center should still feel balanced, while the segment lines create that classic fruit-slice appearance. Even if they are not perfectly identical, the finished look is still charming because small handmade differences often make crochet motifs feel warmer and more natural.
Step 4: Create the White Citrus Contrast
A big part of the citrus look comes from the contrast between the fruit flesh and the pale inner lines. This white or cream section helps separate the wedges visually and makes the slice stand out more clearly. It also gives the design that fresh, summery feeling.
Try to keep this part clean and consistent. Since lighter yarn shows against the bright fruit shades, neat stitching here will make the whole coaster look more polished.
Step 5: Finish the Outer Rind
After the inner fruit is done, the rind frames everything. This outside edge is what gives the citrus slice its finished shape. The border can be worked in a slightly deeper or brighter version of your fruit color, depending on the look you want.
This step is where the whole design usually comes together. Once the rind is in place, the piece reads clearly as a fruit slice rather than just a round motif. If you are making several, this is also the stage where you can begin to see how nice a full citrus set would look together.
Step 6: Check the Shape and Adjust if Needed
Before fastening off, lay the piece flat and look at the outline. The center, segments, and rind should all feel balanced. If one section looks a little uneven, it can often be improved by smoothing the stitches gently or adjusting the way you weave in the ends.
If you want a larger slice, use thicker yarn or a slightly larger hook. If you want a smaller applique, use lighter yarn and a smaller hook. Since the tutorial is described as suitable for several citrus versions, it is a nice design to repeat in different shades and sizes.
Step 7: Finish and Use Your Citrus Slice
Fasten off neatly and weave the ends into the back. Since the selected tutorial is labeled as a no-sew citrus coaster, the construction is intended to keep finishing simple.
Once finished, your citrus slice can be used in several ways:
- as a coaster
- as a summer applique
- on a tote bag or apron
- in a fruit garland
- as kitchen decor
- on gift wrap or a handmade tag
- as part of a playful picnic set
The final piece should look round, bright, and fresh, with clear fruit segments and a smooth edge.
Helpful Tips
- Use cotton yarn if you want the slice to hold its shape well.
- Keep your tension even so the coaster lies flat.
- Check the shape after each round instead of waiting until the end.
- Use a stitch marker if you lose track of the round start easily.
- Make a full citrus set by changing only the colors.
- Block lightly if the finished slice needs smoothing.
Common Mistakes to Avoid
- Pulling the center too tight and causing the piece to cup
- Adding uneven stitches so the circle loses its shape
- Rushing the inner segment details
- Using yarn that is too fuzzy to show the fruit sections clearly
- Forgetting to compare the size as you work
- Making the outer rind too loose compared with the center
Customization Ideas
This project is very easy to personalize. Make it lemon yellow for a bright kitchen look, lime green for something fun and fresh, orange for a classic fruit-slice style, or pinkish grapefruit tones for a softer summery version. You can also turn the slice into a patch, ornament, bag charm, or table decoration. A set of mixed citrus slices looks especially cute for warm-weather decor.
Style Ideas
Use your finished citrus slice on a picnic table, in a summer coffee corner, on a market bag, or as a decorative touch on kitchen linens. It also makes a sweet handmade gift extra when tied onto a jar, basket, or wrapped present. A full set in mixed citrus colors would be lovely for seasonal home decor.
Care Instructions
Hand washing is the gentlest option, especially if the slice is decorative or attached to another handmade item. Lay it flat to dry and avoid high heat. If it loses shape after washing, reshape it while damp and let it dry flat.
Time Needed
This may take a few hours depending on your speed, yarn, size, and stitch pattern.
Conclusion
A crochet citrus slice is one of those happy little projects that feels simple but looks wonderfully detailed when it is done. It is bright, useful, and easy to adapt in color and size. Whether you use it as a coaster, applique, or seasonal decoration, it adds a cheerful handmade touch that always feels fresh. Try one in your favorite citrus shade, then make a few more for a full fruity set.
FAQs
Is this beginner-friendly?
Yes. It is a good project for beginners who are comfortable with basic stitches and want to practice working in the round.
What yarn is best for this project?
Smooth cotton yarn is a great choice because it holds the shape nicely and shows the citrus details clearly.
Can I adjust the size?
Yes. You can make it bigger or smaller by changing yarn weight, hook size, or the number of rounds.
Can I make different fruits with the same idea?
Yes. This style works well for lemon, lime, orange, and grapefruit by simply changing the colors, which matches the selected tutorial description.
Can I use it as an applique instead of a coaster?
Yes. It works nicely as a flat applique for bags, towels, clothing, and decorative projects.


