
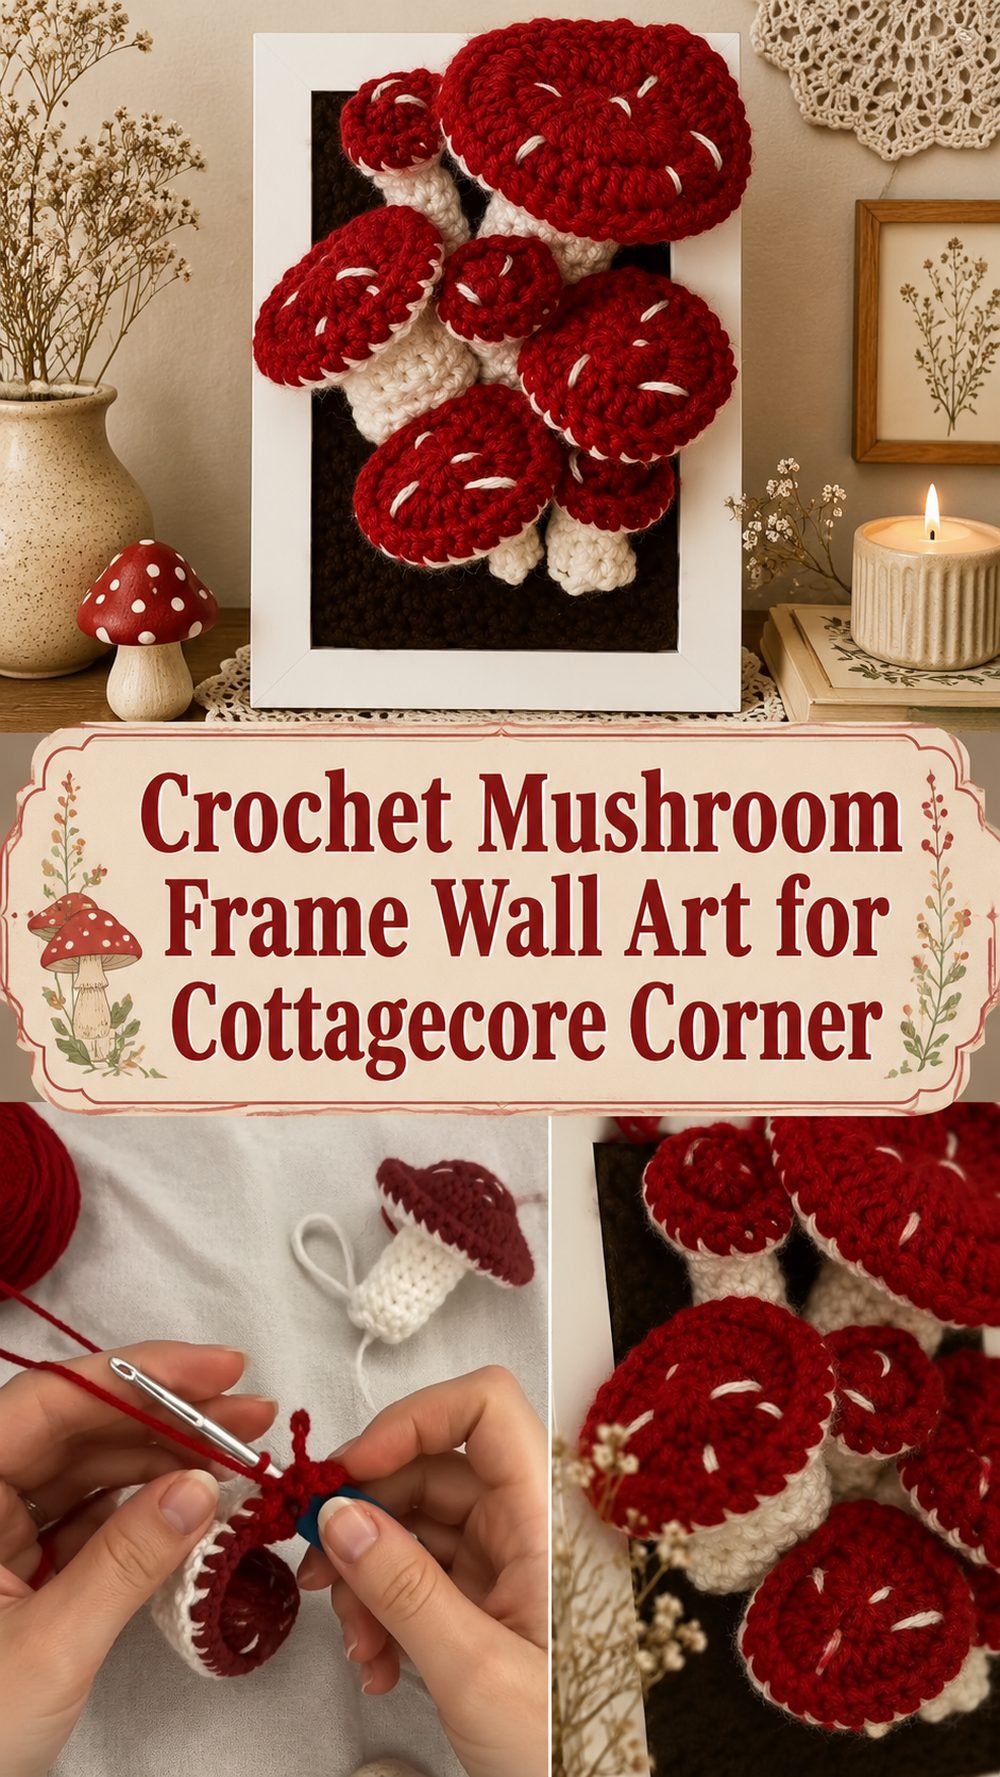
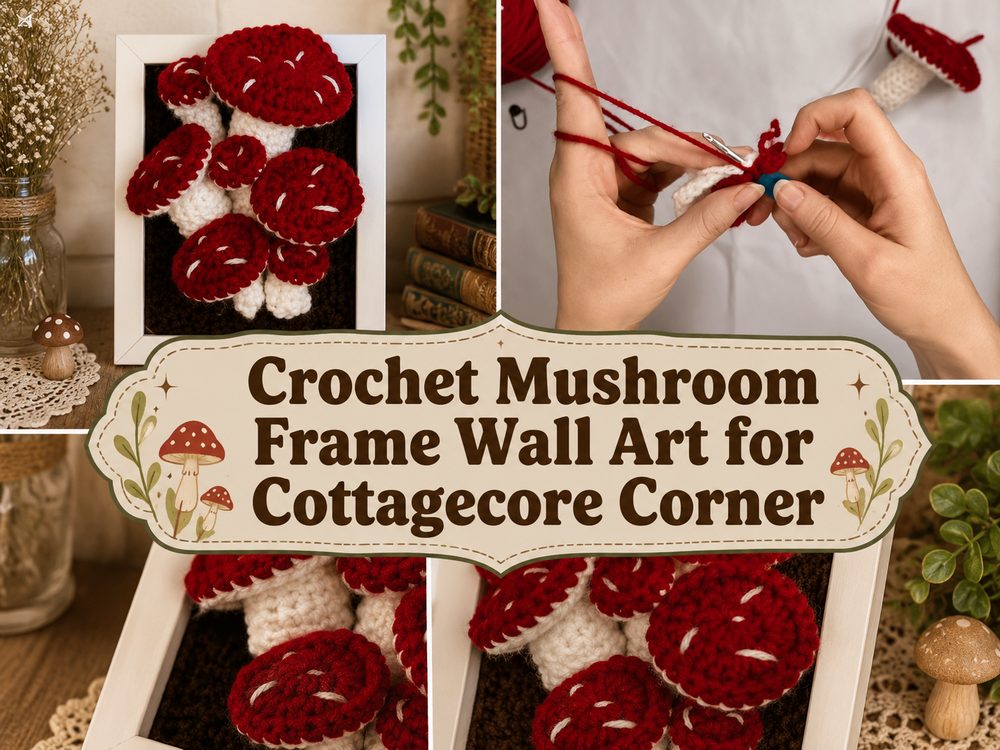
A small crochet mushroom frame can add a soft, whimsical, homemade touch to a room. A YouTube tutorial for a crochet mushroom frame wall-art project with customizable colors inspired this project. It transforms simple flat crochet into super cute wall decor that looks beautiful in a reading nook, craft room or cozy bedroom.
Required Materials
- Yarn
- Crochet hook
- Scissors
- Yarn needle
- a stand or base to display the finished crocheted piece
Select yarn and hook size to get the fit and texture you want.
Which Yarn Is Best for This Project?
This one is very nice in a yarn that has good stitch definition for wall decor. Cotton or a nice smooth acrylic will give a neat and tidy look to the mushroom shapes.
Hardness
Moderate to easy.
Size & Fit Guide
You can make the pieces of the mushroom smaller or bigger by changing your yarn weight and hook size or by changing the shaping as you go. Select a frame size to match the style you want to create.
Used stitches
The project is worked in simple flat crochet, with shaping for the mushroom pieces. Keep your stitches neat and even so the finished art fits nicely in the frame.
How to Prepare It
Kickstart the Foundation
Start by crocheting the flat mushroom shapes that will sit inside the frame. This is a display project so work carefully and keep the fabric neat.
Section Work (Principal)
Now take the mushroom caps and stems and combine them. Add any small details shown in the tutorial to give the design some more personality and texture.
Change The Size
Keep comparing your crochet pieces to your frame as you go. Repeat or make adjustments until the layout fits the space as you like.
Become a Member or Shape
Neatly pin the finished mushroom pieces to the backing or inside the frame. Allow time to get everything into place before securing.
Finish Edges
Tie up any loose ends, ensure the final piece sits flat. A neat finish makes wall art look much more professional.
Helpful Hints
- Use stitch markers if your shaping starts to wander.
- Weave in all your ends, checking the fit inside the frame as you go.
- If you are making more than one mushroom, keep the same tension and shaping.
- Blocking light can help the flat pieces lay better.
What to Avoid
- making the parts too large for the frame
- With very uneven tension
- Fitting the pieces together before attaching
- Display piece skipped end-weaving
- Choosing colors that blend in too much
Ideas for customization
- Choose soft cream, brown, sage or dusty red for a woodland look.
- For a more full design, add extra mushrooms.
- Use a thrifted frame for a more vintage appeal.
- If your style allows, add tiny floral or leafy details.
Style Ideas
This is beautiful on a gallery wall, shelf, bedside corner or over a small desk. It’s also a cute handmade gift for someone who loves cozy decor and forest-inspired crafts.
How to Care
Dust as needed lightly. If the piece requires cleaning, be gentle, use cool water, gently reshape and allow to dry flat before replacing in the frame.
Time required
This will take a few hours depending on your speed, yarn, size, and stitch pattern.
Conclusion
If you love soft handmade decor with a whimsical touch, this crochet mushroom frame is a lovely project to take on. Small enough to be accessible, but special enough to light up a whole corner of a room.
FAQs
Can beginners make this?
Yes, especially if you are comfortable with basic crochet and simple shaping.
Can I change the colors?
Yes, this project works beautifully with earthy, pastel, or bold mushroom shades.
Does it have to go in a frame?
A frame gives it the cottagecore wall-art look, but you can adapt the idea for other displays.
Can I make it bigger?
Yes. Use thicker yarn, a larger hook, or repeat until you reach your desired size.
Is this good for gifts?
Yes, it makes a very thoughtful handmade decor gift.


